I think there is a kind of ebb and flow when you are building a dollshouse. In the early stages, you race ahead, and progress seems rapid as the shell takes shape. Then it slows down to a steadier pace as you add construction details like staircases and conservatories. But then there are weeks where it is like wading through molasses, when you can spend a whole week gluing on shingles (or painting them... shudder) and feel like you have nothing to show for it.
This week has felt more like a leap and a bound, as I have been able to get back to things that make a visible difference, after fiddling around with all that cornicing and skirting the last few weeks.
With the trim all completed in the mezzanine, I felt it was safe to hinge in the Grandtline bedroom doors. These work on a simple pin & pivot system - the door frame has two cut-outs top and bottom to accept the molded pins at the top and bottom of the door, and the door pins are retained in the cut-outs by gluing in incredibly fiddly tiny bits of odd-shaped plastic across the fronts of the cut-outs.
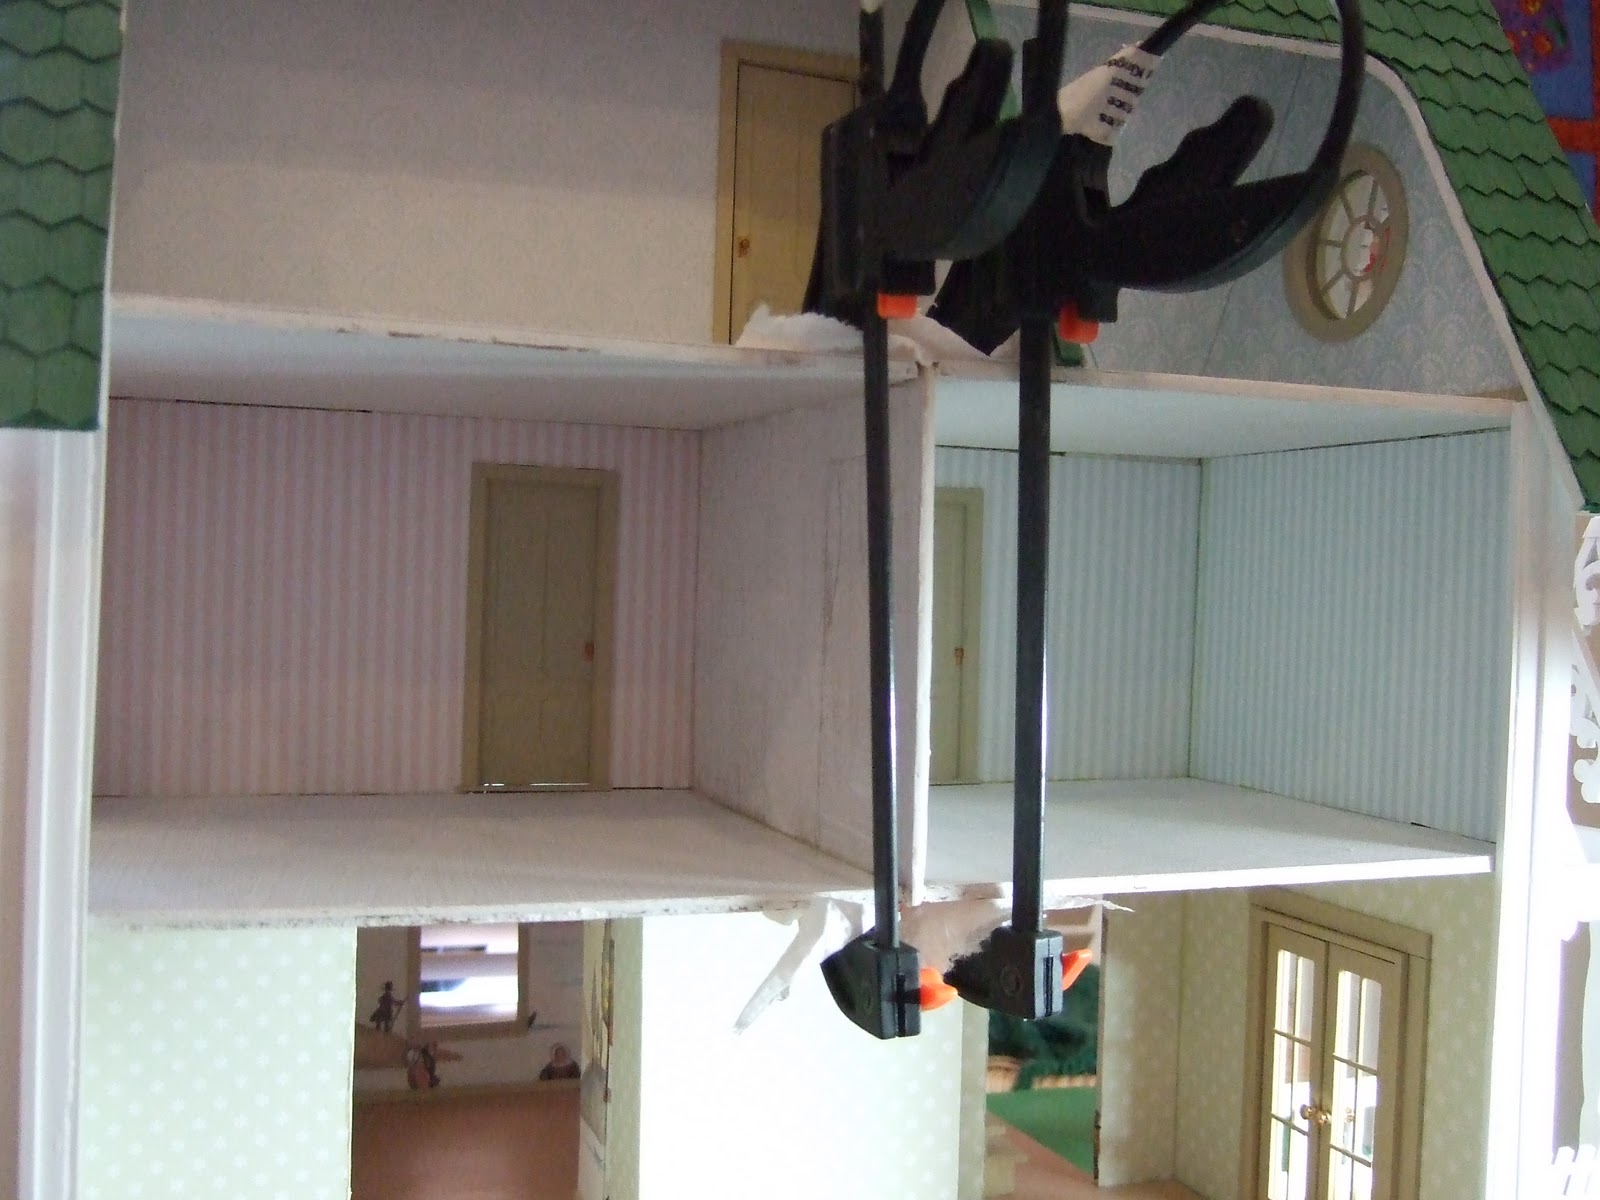
With the bedroom doors in, I could finally add the last main construction component: the bedroom dividing wall. The tabs at the front edge fit into the slots in the floors above and below.
The top slot is hidden by the bathroom floor, but I had to fill in the slot in the kitchen ceiling: first with normal filler, then after I took this picture, I applied a smooth surface coat of fine filler. I will sand this smooth if it needs it, then touch up the paint with the same textured paint I used on the main kitchen ceiling to make it unobtrusive. You can see that the bedroom wall protrudes slightly at the bottom, not sure why as it's fine at the top.
Then I added wallpaper to both sides of the dividing wall to finish the papering in the two bedrooms.
Mezzanine Railing
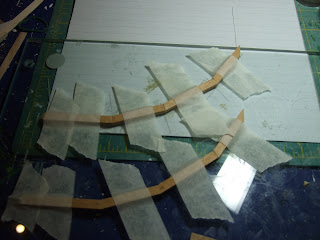
As per my last post, I had used my tracing of the mezzanine floor outline to cut the pieces for two railings, cutting the mitres by eye to fit around this odd shape.
I glued the railing pieces together in the following way. I put a sheet of glass down over my drawing, and glued the pieces directly on top of the glass, taping each piece in place so that the pieces were retained exactly in the correct outline as the glue dried. This has two benefits: the railing dries absolutely flat, and the wood glue doesn't stick to the glass. There is a third benefit: when I had one railing all finished and glued, I just slid the glass along and taped/glued my second railing on top of the same outline. My piece of glass is an unused Ikea glass shelf from a bathroom cabinet.

I spent some time experimenting with my banisters, that I bought from The Dollshouse Builder at Miniatura. I wanted to end up with a mezzanine railing that is a similar height to the stair railing. I stacked my two new railings next to the stair railing, and held up a banister next to them, to see where I should cut the banister. I decided to retain the top carved detail, and most of the bottom carved detail. I cut off the top of the banister to leave a 'peg' above the carved detail, and I cut the bottom of the banister short, then whittled the remnant (up to and including the lowest bump on the lower carved detail) into a pointed stump. The reason for leaving the peg and the stump is so that I will have something to glue into holes I would drill in the railings, to give the railing some strength. After measuring for holes (see below), I knew I needed 25 banisters, so I cut and trimmed 26 to be safe. Then I gave them and the railing a quick squirt of white primer spray. Guess what happens when you apply aerosol pressure to little round posts? Yes, they go flying off all over the patio...

To decide where to drill the holes, first I went and measured our real-life banisters. Our 1:1 railing has 3-inch gaps between posts, and the posts are set apart at 5-inches from centre to centre. After hurting my brain with a bit of arithmetic and measuring the thickness of my banisters, I decided that 1/4 inch intervals would be about right for drilling my holes. I used my quilting ruler to, first, mark the centre of the railing, and then to mark cross hairs at 1/4-inch intervals.
Then I taped together the two railings, and used my Dremel hand-held drill to drill holes at each cross-hair, choosing a drill size that my 'peg' fit into snugly. It was surprisingly hard to be exact about drilling the holes - I wish I had a drill press attachment. I put the railing on a bit of scrap wood, so that I could drill right through both railings without ruining my mat.
There was then a pause of a day or so, while I sanded and painted the railing and banisters: railing in Bleached Bone to match the main trim, and the banisters in white.
Today I glued the banisters into the railing. First dipping the 'pegs' at the top into some Tacky Glue, and screwing these snugly into the holes in the top railing. Then smearing Tacky Glue along the bottom railing, and fitting the whittled stumps into the bottom holes. I had to whittle a couple of these a bit more to make them fit properly. The whole effect has come out better than I expected. It needs a bit of fixing here and there, and it isn't exactly perfectly even, but it looks surprisingly well when I put it in place. DH says he wants to live in the Fairfield. The next steps will be to improve the appearance of the railing with trim and cover over the top railing to conceal the holes.


wow, what a difference!! I love stairs I think that they add so much so the house. Love what your doing!!
ReplyDeleteThe railing turned out very nice, I'm impressed.
ReplyDeleteUn gran trabajo. La barandilla le ha dado mucha elegancia.
ReplyDeleteBesos Clara
This is a lovely balcony. I find railings incredibly difficult to do, because of their flat bottoms so I love seeing how you have done yours with the pegs top and bottom. Thanks again for being so generous and sharing the process with us.
ReplyDelete