This week I was finally brave enough to open the bag containing the kitchen kit that I bought from Judith of 'In Some Small Way'. Judith designed this kit together with Susan Karatjas (who does the laser cutting) as a 1/24th replacement for the Miss Lydia Pickett kitchen which was never made in 1/24th scale.
As you can see, the kit includes four units: an Upper Cupboard unit, left and right Lower Cupboards including a sink and hob, and a pantry unit including an oven, microwave and refrigerator. All appliances and drawers are false fronts. The kit includes the green wallpaper decorating the front of the cupboards, all the knobs, the sink and taps, and the grocery goods on the shelves. There's even a window and scene to go behind it, in case your room box needs a view.
The Miss Lydia Pickett kitchen is quite different, as you may be able to make out from this photograph of a printout from a web photo. The upper cupboards have an extractor hood above the stove, and a built in fridge connects the upper cupboards with the lower cupboards. An island contains the sink and a breakfast bar, with drawer detail and storage baskets on the side facing the viewer. A hutch fits into the right corner of the room.
I am going to try to kit-bash Judith's kitchen so that it looks more like the LP kitchen. However, my kit-bashed Fairfield kitchen has different proportions than the LP kitchen. So you can see why I have been procrastinating.
The plan
Having read through the instructions for Judith's kit which include helpful illustrations showing all the kit pieces, I've decided on the following modifications:
- I'm going to wrap my kitchen around into the righthand alcove, by dividing off the oven/microwave unit of the pantry cupboard, and installing it around the corner.
- I will position the refrigerator opposite the oven/microwave unit, in the corner of the room, and I will probably use a plastic refrigerator that I already own (it used to be a fridge magnet) rather than the faux fridge that comes with the kit.
- The remaining third of this unit, the pantry, will become a hutch in the righthand corner of the room.
- I will use the upper cupboard from the kit, and run it across so that it overlaps the oven/microwave unit.
- I will use the righthand lower cupboard from the kit (which would normally hold the sink) as my kitchen island, since it is shorter. I'm not going to put the sink on the island, as I think that if I lived in that house, I really wouldn't like having to wash dishes out on view like that. So I will put the hob/stove on the island instead.
- I will use the lefthand lower cupboard (which would normally have the hob/stove) against the wall, underneath the upper cupboard.
All of the kit units are constructed in basically the same way. A simple box is constructed and painted. The green paper is applied over the front side, then a laser-cut trellis-like grid is painted and glued down which gives cleverly gives the impression of faux drawers. Open shelves are assembled and slotted into the simple box inside openings left for that purpose. The hob/oven/microwave are pieces of wood painted black, with artwork applied on top to make them look like appliances. This simplicity and lack of working drawers makes it easier to kit-bash the units (I am hoping).
Beginning to bash - Oven/microwave unit
1) I cut the front trellis of the oven/pantry/refrigerator unit into thirds, carefully, with a sharp scalpel. The oven/microwave is the left piece, the pantry is the middle piece and the fridge (which I likely won't use) is on the right.
2) Then I used the oven unit from step (1) to trace off the appropriate widths of the front and back panels from the original triple unit. I cut these with a scalpel.
3) I used the original side pieces from the original triple unit, and cut shorter pieces from the top and bottom unit to use for my new cabinet.
Then it was a simple matter of gluing together this rectangular box.
4) The new slimmed down unit in its place, in the alcove.
Kit Review: Petite Properties 1:24th Wall Cupboard

This is another one of the cheap cardboard kits that I used in the little girl's bedroom. This one is for a front opening wall cupboard with one shelf, which comes with thin acrylic 'glass' and some knobs for handles. It is superb value at £2.99 from Petite Properties here in the UK (
http://www.petite-properties.com/)
As before, the good quality card (like mat board) is cleanly cut by laser, with additional etched detail on the doors, and the pieces fit together cleanly. Having learned my lesson on the previous kits, I was very careful to bend each corner over a metal ruler, to get a clean bend with no delaminating of the card layers.
There are only four pieces: the main cupboard all in one piece including the doors, a top and bottom, and a shelf. It assembles very quickly into an attractive cupboard.
What I am thinking is that this will be a cupboard above my refrigerator, to make the refrigerator look more built-in. It's a similar width to the fridge, but not as deep, so I will likely need to add false sides.
Bashing the left lower cupboard
I am going to turn this into my sink unit, against the wall, and I am going to include a dishwasher (another fridge magnet) as I can't imagine life without one.
1) The front trellis includes a 'blank' area where the righthand lower cupboard would have butted up to make the 'L'-shaped counter from the original kit. I trimmed this off.
Then I used the 'trellis' part to measure and cut the front piece, as well as the bottom piece. I am not adding the top piece yet because my sink will need to drop down into the cupboard space. I left the back full width, so that I will have support for the counter top and new side.
2) I used the original sides from the lower cupboard and the original interior brace. However, I have positioned the brace further to the left, in order to allow for my sink to be positioned directly underneath the 'extractor hood' on the upper cupboard.
You can see how the upper and lower units are going to overlap the oven unit, making it all look built in (hopefully).
3) The dishwasher is going to go in the space that I left for it in this unit. However, it's too tall so I am going to have to cut some of the base off. This is a fridge magnet that has an opening door with interior racks that slide out. I cleaned up on 1/24th scale appliance-shaped fridge magnets at a Fridge Magnet shop in San Francisco in the tourist area.
Shopping
Today my DH drove me up to Birmingham to visit the UK's biggest and best dollshouse show, Miniatura, as a belated Christmas present. However, I had committed to only keeping him waiting for two hours, so I really had to whiz around. I was basically glancing at stalls to see if they had anything on my list, and moving on if they didn't.
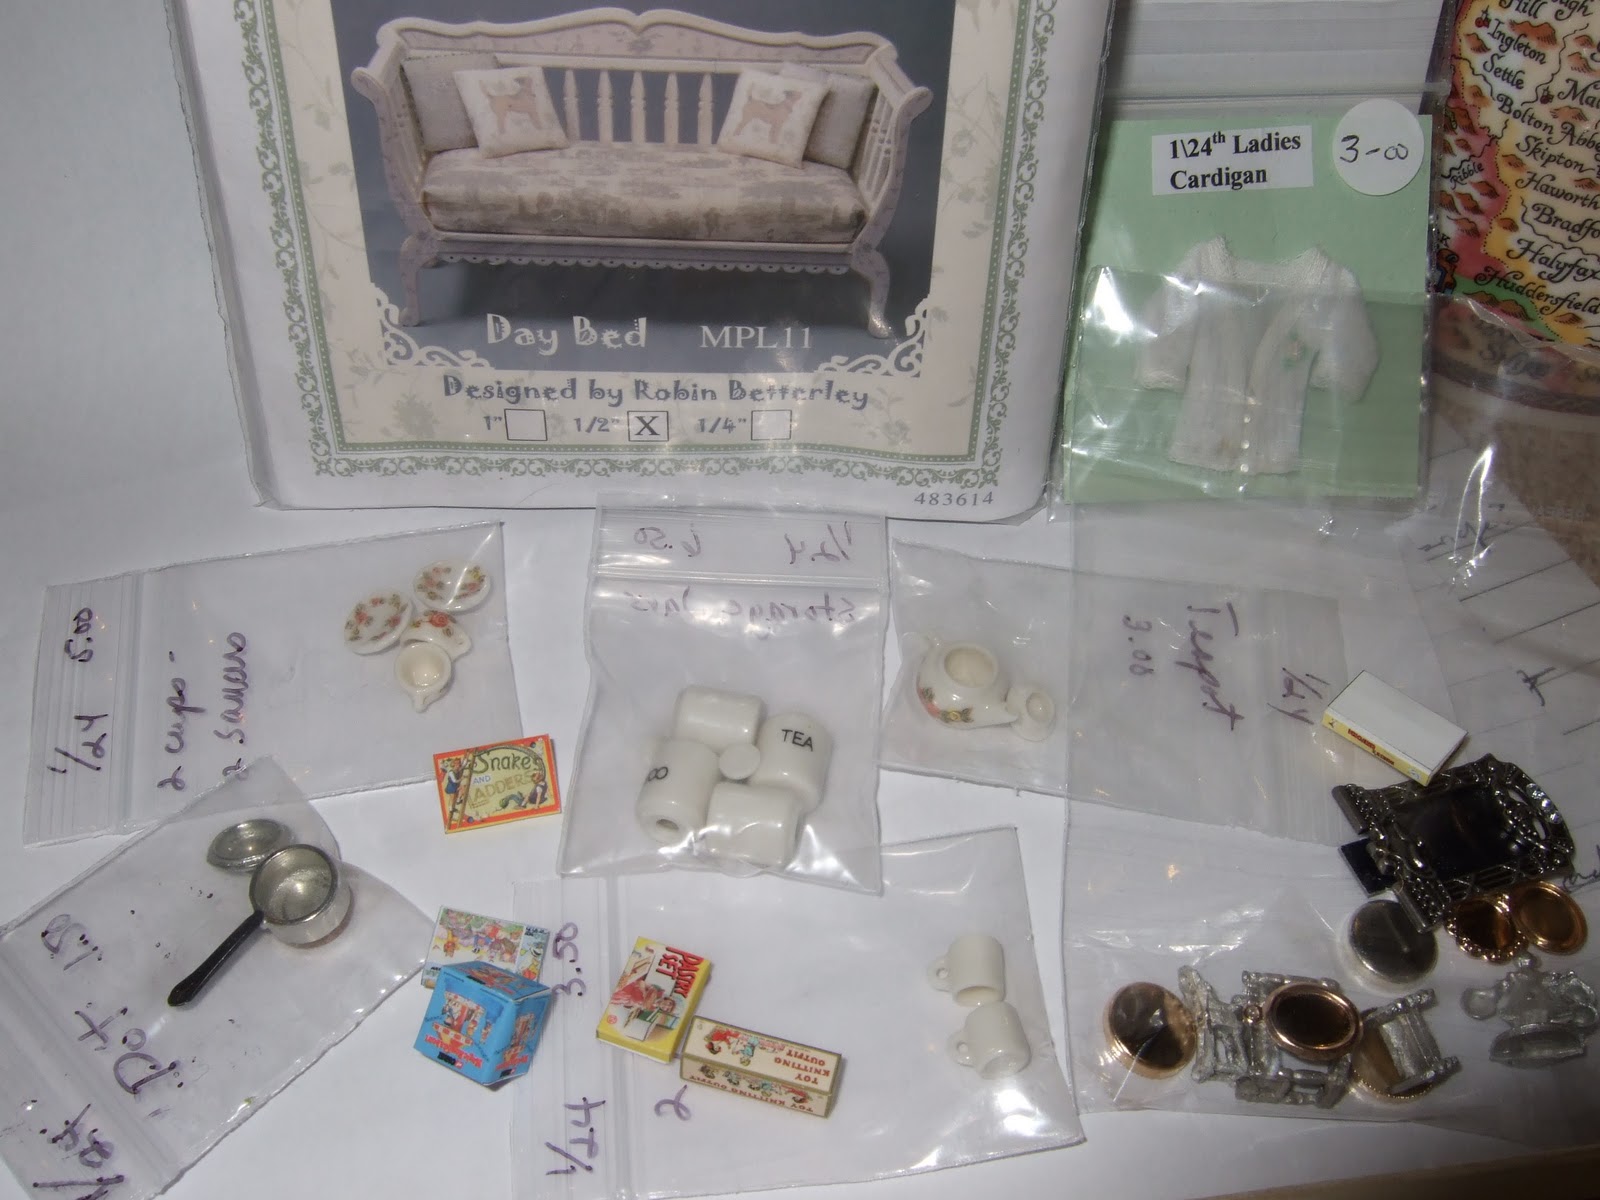
As you may have gathered, my favourite source for smaller scales here in the UK is 'In Some Small Way', and I was able to pick up a second LP sofa for my scantily-furnished living room, a saucepan, a teapot with matching cups and saucers, and two mugs from the lovely Judith. On another stall, I picked up some charming vintage childrens packing items (boxed games etc.). I found a faux 1/24th cardigan which will look nice in the Fairfield bedroom, and from Tee Pee crafts I picked up a bunch of findings which will hopefully be accessories for the little girl's room, plus a mirror frame for the hallway. It was a whirlwind tour. 1/24th scale is still not widely available here in the UK. There's a lot more than there used to be, but very few dedicated suppliers. Typically a stall that sells, say, china or glass or plants will have one small area with a few items in 1/24th scale.
So, I'm feeling good that I am finally tackling the kitchen kit bash and that I now have a plan. Let's just hope it works...


 I assembled the right hand cupboard from the kit, which would normally house the sink, as per the kit instructions. I had a little trouble with the corner shelves. The instructions say to glue the shelves even with the right edge, so they protrude on the left edge (front edge) of the side wall. But when you glue on the back of the unit, it has grooves cut into it, to receive the back of the shelves. If the shelves are even with the right edge, then the grooves will just be empty air and won't be supporting the back of the shelves. I compromised and nudged the shelves so they were sticking out the back a little, to fit into the grooves on the back.
  The pantry cupboard is made from 1/3rd of the original oven/pantry/fridge unit, similar to the way I made the standalone oven unit. I cut new side pieces from the remaining third of the front and back of the original unit, as I am not going to make the refrigerator from the kit. Oh, and when it says 'dry fit the shelves and then glue', it turns out the shelves have a right way up. I was concentrating on centering them to fit into the cut-out in the front piece, and forgot to check that the trim piece matched the shelves. It didn't because I'd glued them the wrong way up. Luckily I was able to pry them apart later and do it again - I love tacky glue.