Sunday 24 April 2011

Cabinets installed

I had an extra day to work on this as we are having a four-day weekend in the UK for Easter, so I spent a pleasant few hours in my bedroom listening to podcasts while I worked on the kitchen.


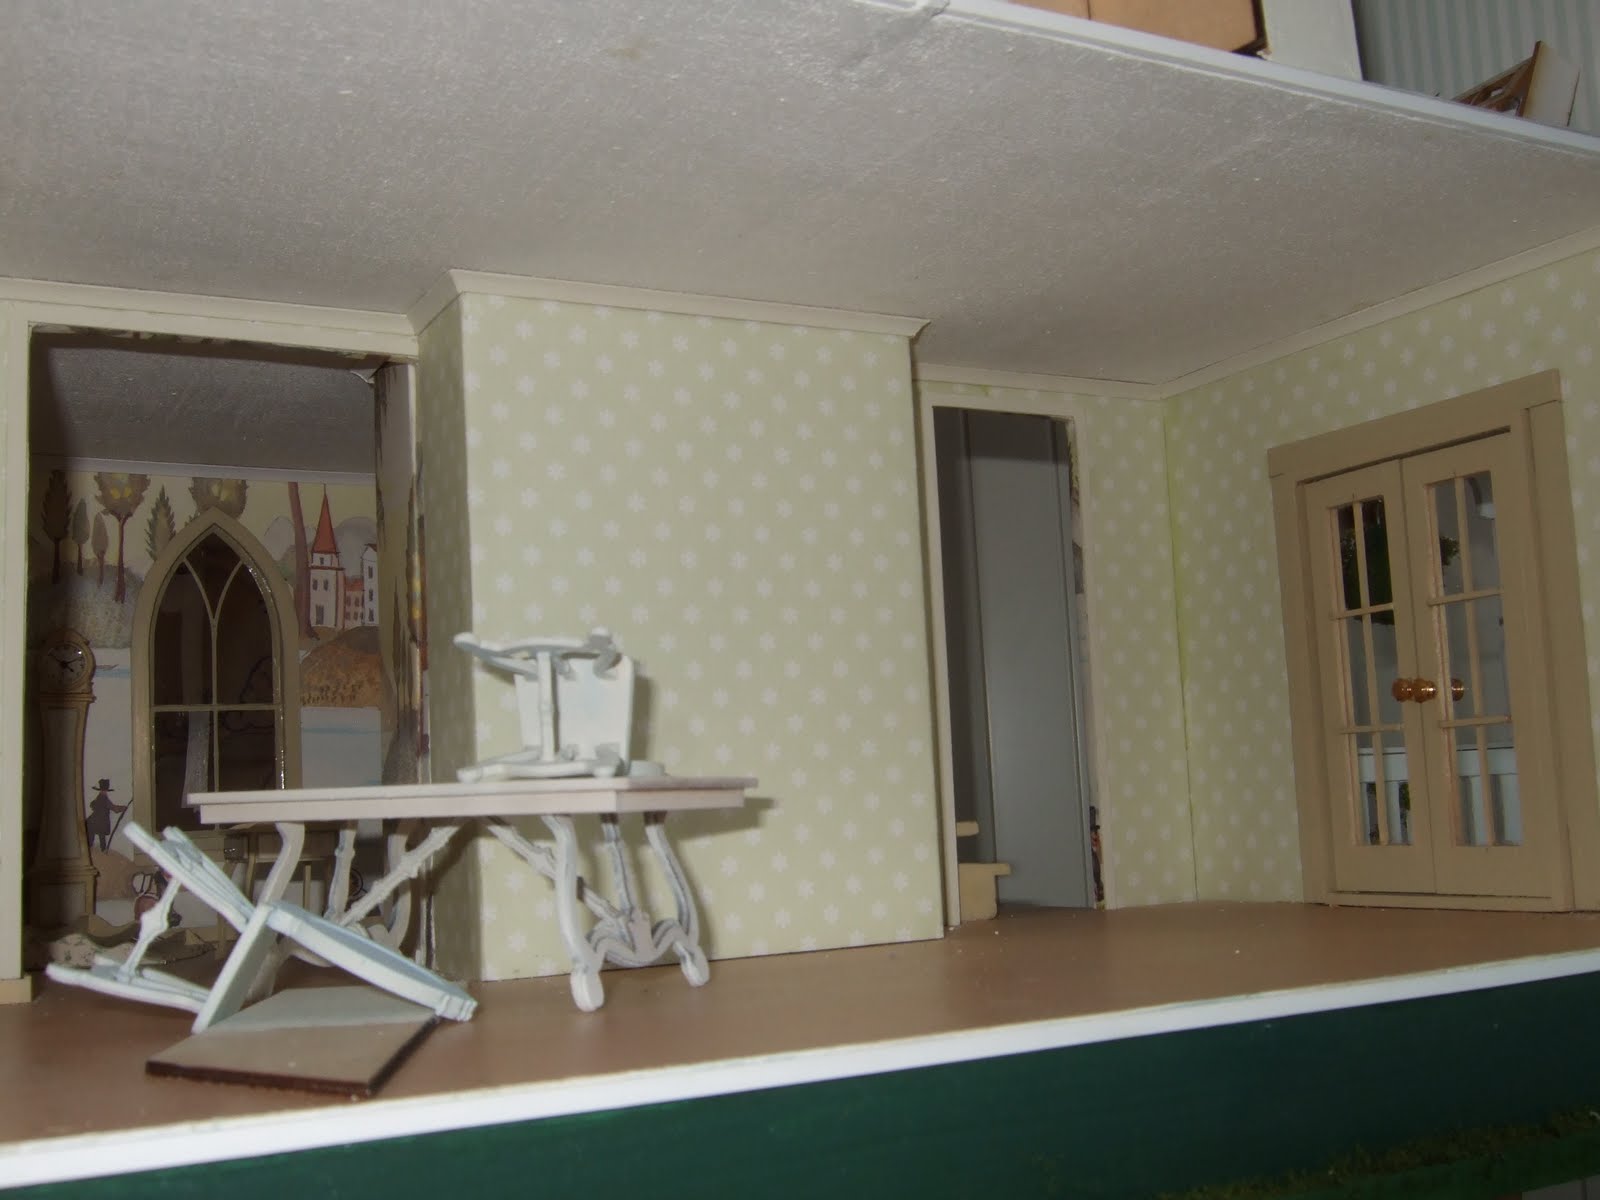
Before I installed the cabinets, I wanted to trim out the room.  I framed the door openings with 1/32 by 1/4" wood, painted to match the cabinets. I also glued a short length along the top of the bay window to hide the wobbly edge of the cutout.

Then I added coving around the edges of the ceiling, again painted to match the cupboards.


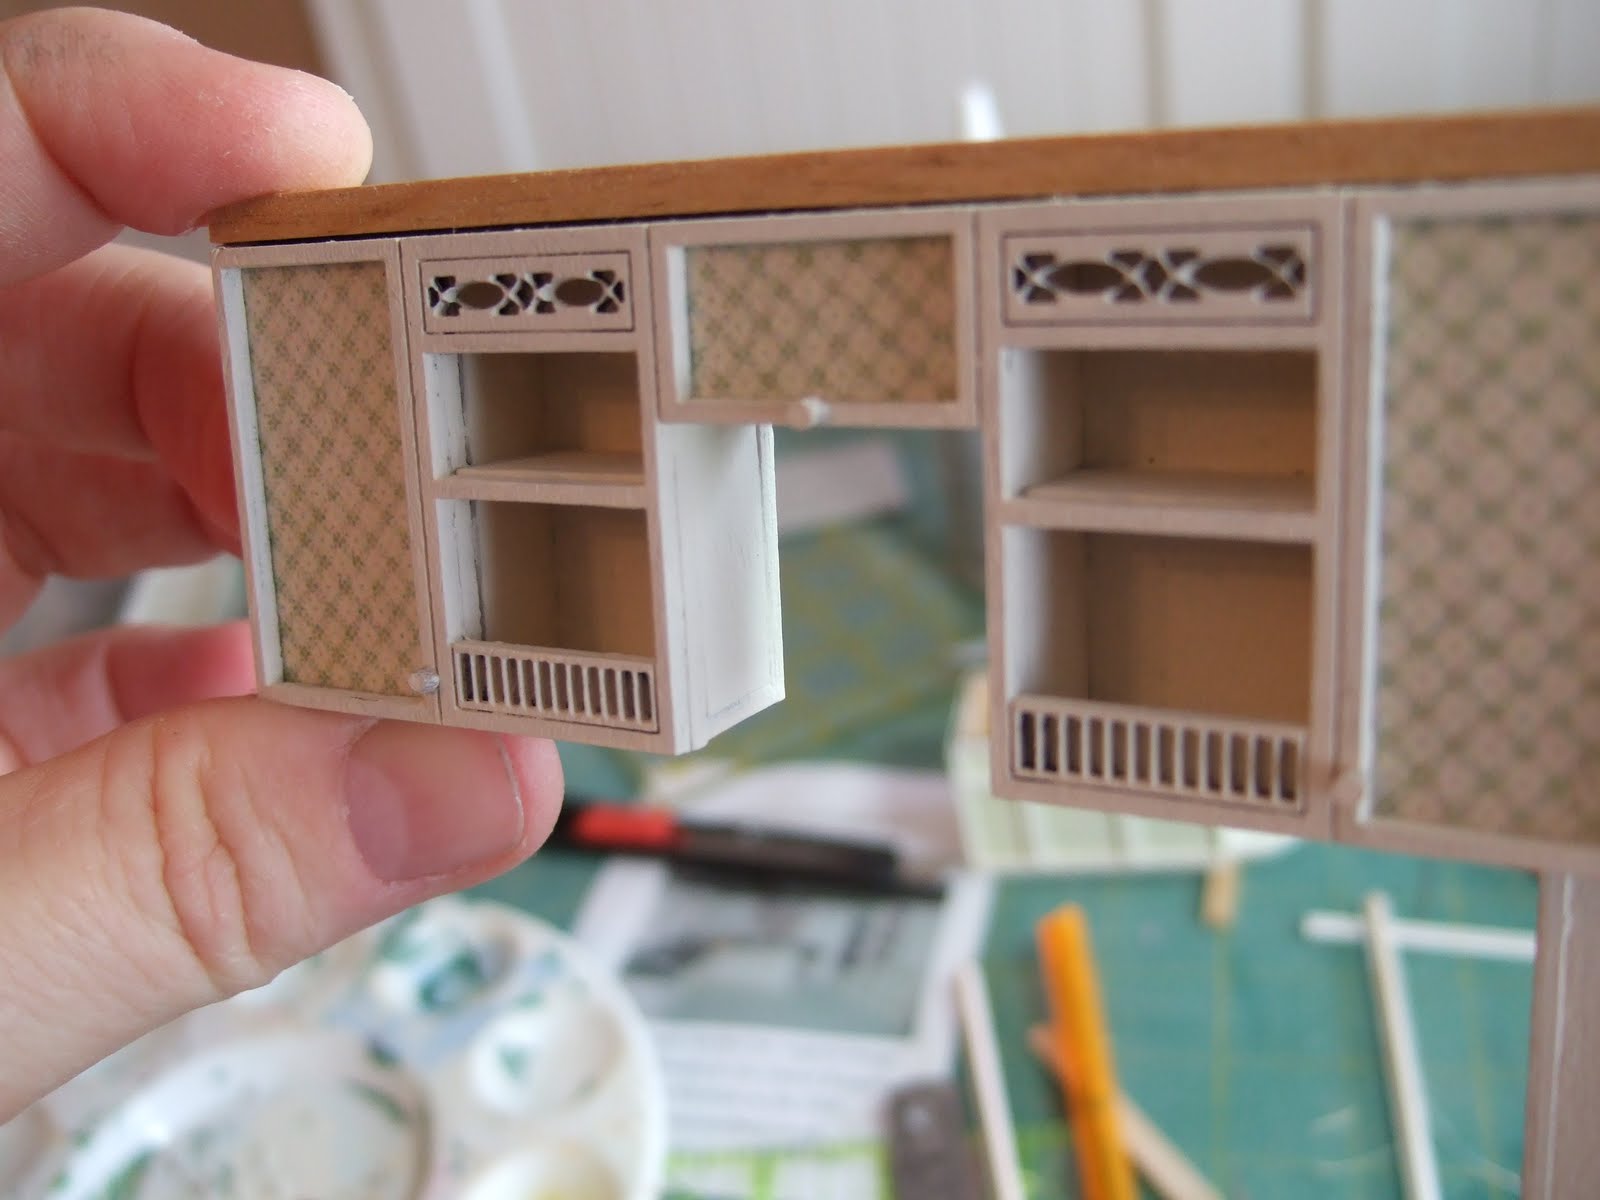
At long last I could glue in the upper cabinet / oven cabinet combo.


Once the glue had set on the wall cupboard, I glued on the 'tile' paper - overlapping it right onto the oven cupboard. This paper was a cut-out from a magazine, and I sealed it with Decoart Multi-Purpose Sealer.


Then I glued the sink cupboard on top of the 'tile'.  To my relief the tiles line up fine with the countertop, and the tap is centred under the cut-away in the wall cupboard.


Then I glued in the dishwasher, and glued on an end wall which I cut from the original countertop that came with the kit.  I love this picture, it looks like you could walk right into the house.


Tonight I have spent about three hours assembling tiny little 'groceries' to stock the shelves with.  The colour printables of labels and boxes come with the kit.  The kit also includes some wooden forms of various sizes, including a dowel for the 'tin cans'.  I found that I had to use mostly my own wood scraps as the forms that come with the kit are either too thick, or not the right shape, for the printables.  It is incredibly time consuming, I feel like I have very little to show for my evening even though I managed to make about 30 tiny groceries. I took this in-progress picture about halfway through the job.


I may be going to the London Kensington dollshouse show, where I will have to look for some 1/24th scale wine bottles to go in my wine holder, and hopefully a couple of stools for the breakfast bar.


DS still hasn't painted the other little car for me, although I have asked several times (some might call it nagging but I just don't want him to forget  :)

Sunday 17 April 2011

Worktops

Still on the kitchen this week, although at least I made it as far as applying the worktops (counters) to the cabinets.

I cut up some leftover cornice from the kids' bedrooms and used it to finish the tops of the wall cabinets.  After I glued it in place, I gave it all a few coats of 'Tapioca' so it matched the cupboard.


Then it was finally time to tackle the worktops / countertops.  I bought the resin? granite-look worktop from a supplier at Miniatura, who told me it could be cut with a good handsaw or a sharp knife.  Um, no it can't.  Or at least, not in any reasonable timescale.  Several minutes of carefully scoring across the underside with various sharp knives, and my razor saw, produced a very shallow modest groove.  So it was into the attic and drag out my Unimat Basic which has a primitive scroll saw.  It made hard work of it, but did manage to cut a more or less straight line.  I was then able to clean up the cut quite well using fine wet&dry sandpaper.  As well as trimming the width, I trimmed off the corner above the corner shelf, similar to the counter in the original kit.


For the main cupboard, I again cut it to width.  Then to cut the sink aperture, I used the original counter from the kit to mark the opening - ensuring it was centred under my cut-out in the wall cupboard.  Then I used my Dremel multi tool to drill a hole in each corner of the rectangle, so that I could fit the blade of the Unimat up into the rectangle to cut it out.  The hole in each corner let me turn the blade to cut the next side.  I cleaned up the cut with sandpaper wrapped around a stick.


The sink came with the kit, and was made of clear plastic.  I carefully cut off the excess (but I wish now I had trimmed even closer to the 'sink') and painted the underneath in Games Workshop Mithril Silver.  I also painted the bent wire 'faucet' that came with the kit, and the two bead 'taps' in silver.  Then I glued them all in, drilling a hole for the faucet.


The Miss Lydia Pickett kitchen island has a nice gingerbread trim under the breakfast bar.  I cut up a Northeastern Apex Trim to make a similar effect on mine.


Now I just need some 1/24th stools for my breakfast bar.  I couldn't find any at Miniatura, so I may have to try building them which could be tricky.

My last picture is of my teenage son's contribution to the project.  DH and DS went to a modelling show on the weekend, where their goodie bags included this small metal car.  DS painted it for me in his choice of 'girly' colours, and I've asked him to do the other one in 'boy' colours for the boy's room.


Sunday 10 April 2011

I can't believe it's been a year

I've just realised that I missed my blog-iversary - it's now been more than a year since I started this project on 2 April 2010. So I'm either really getting my money's worth from the Greenleaf Fairfield kit in terms of hours of enjoyment, or I am just incredibly slow.  Or maybe a bit of both.  If I didn't have to work, and could spend hours every day on my dollshouses, then this blog would have been concluded a long time ago.  Sadly I live in the real world and have to spend five days a week at a desk in London, where I don't even get much time to read other people's blogs.  Sigh...

This week I have continued to apply the wallpaper and trim to my kitchen cupboards.  This is the oven cabinet with the microwave and oven glued in place.


There is far more wallpaper provided in the kit than you actually need.  So I decided to add some faux cupboards to the other side of my kitchen island by using some of the excess wallpaper.  I turned the unused trim from the refrigerator (because I am using an actual refrigerator) sideways, cut off the 'cupboard' and cannibalised the cut-off part to make uprights.  It isn't quite right as the kickboard at the bottom is disproportionately high, but you will only be able to see this side of the island by peering in the windows so I think it will be alright.  Better than a blank face.


This is how much wallpaper I had left over.

I'm not going to be able to use the prepared cornicing provided in the kit, so I glued on a thick board on top of the wall cabinet which will act as a foundation for gluing new cornice to.


I added a spacer bar down the right side of the oven cabinet as it isn't quite wide enough for the alcove where I am putting it, then added a matching cornice-base to the top of the oven cupboard.  Then I glued the wall cupboard to the oven cupboard, forming an 'L' shape.


At this point, I tried everything in place to see how it was going to look.  I like it. The wallpaper in the kit suits the green wallpaper in the room, and the cabinets all look fairly natural and not like they have been kitbashed.  Whew!

I haven't painted the dining set yet as I am waiting until the kitchen is done before I decide on colours.


Then it was time to add the knobs.  These come in the kit and are basically tiny segments cut from a dowel.  The instructions recommend that you paint them by rolling them around in a puddle of paint, then rubbing excess paint off between your fingers.  I found it took two coats, and the dark sides of the cylinder were still showing but I decided to leave them as otherwise my knobs would be invisible against the matching cupboard.  I applied them with tweezers, dipping them in glue and then positioning them. I had to go downstairs and look at my real cupboards to see where the knobs should go.


Sunday 3 April 2011

Kitcheneering

Still working on the kitchen, which I'm sure doesn't surprise anyone. I've spent most of my time this week painting the cabinets and trim, using acrylic paint in 'Tapioca' colour, which is a slightly yellowish white.  There are so many nooks and crannies that it takes a surprisingly long time to do each coat.  Also, I found that there seems to be a bit more charring on this kit than on the LP kits, and it has taken a few more coats to get a clean edge.  Plus sanding lightly between each coat.


I also painted a coat of DecoArt multi-purpose sealer over all the artwork:  the wallpaper that comes with the kit, all the groceries and labels that come with the kit, the printed oven/microwave/stove that comes with the kit, some potential tiles that I printed from Jim's Printables site online, and some alternative potential tiles that were in a dollshouse magazine a while ago.  Although the sealer leaves a slight sheen and in a very bright light you can see brush marks, I prefer to protect the artwork so that I don't have to worry about ruining it if I get moisture onto the inkjet surface.


The hob/stove, oven and microwave will all make up the same:  you paint the edges of the provided wood square black, then glue on the cutout.  Here is my hob, pictured on top of the countertop that I am considering using.


The cabinets are all constructed in the same basic way.  I've made up one so far, and will work on the others this week.

First, you cut out wallpaper to fit behind the 'cupboard' part of the cabinet, slightly smaller than the trim piece so the paper edges won't show.  This gets glued on the cabinet.


Then you glue the trim piece on top, to give the illusion of doors.  There are knobs provided in the kit. It's very simple, but it is going to take me a while to complete all of the cabinets to this stage.