Sunday, 20 March 2011

Kitchen kit bashing, and shopping

This week I was finally brave enough to open the bag containing the kitchen kit that I bought from Judith of 'In Some Small Way'. Judith designed this kit together with Susan Karatjas (who does the laser cutting) as a 1/24th replacement for the Miss Lydia Pickett kitchen  which was never made in 1/24th scale.

As you can see, the kit includes four units:  an Upper Cupboard unit, left and right Lower Cupboards including a sink and hob, and a pantry unit including  an oven, microwave and refrigerator.  All appliances and drawers are false fronts.  The kit includes the green wallpaper decorating the front of the cupboards, all the knobs, the sink and taps, and the grocery goods on the shelves.  There's even a window and scene to go behind it, in case your room box needs a view.

The Miss Lydia Pickett kitchen is quite different, as you may be able to make out from this photograph of a printout from a web photo.  The upper cupboards have an extractor hood above the stove, and a built in fridge connects the upper cupboards with the lower cupboards.  An island contains the sink and a breakfast bar, with drawer detail and storage baskets on the side facing the viewer.  A hutch fits into the right corner of the room.


I am going to try to kit-bash Judith's kitchen so that it looks more like the LP kitchen.  However, my kit-bashed Fairfield kitchen has different proportions than the LP kitchen.  So you can see why I have been procrastinating.

The plan

Having read through the instructions for Judith's kit which include helpful illustrations showing all the kit pieces, I've decided on the following modifications:
  • I'm going to wrap my kitchen around into the righthand alcove, by dividing off the oven/microwave unit of the pantry cupboard, and installing it around the corner.
  • I will position the refrigerator opposite the oven/microwave unit, in the corner of the room, and I will probably use a plastic refrigerator that I already own (it used to be a fridge magnet) rather than the faux fridge that comes with the kit.
  • The remaining third of this unit, the pantry, will become a hutch in the righthand corner of the room.
  • I will use the upper cupboard from the kit, and run it across so that it overlaps the oven/microwave unit.
  • I will use the righthand lower cupboard from the kit (which would normally hold the sink) as my kitchen island, since it is shorter.  I'm not going to put the sink on the island, as I think that if I lived in that house, I really wouldn't like having to wash dishes out on view like that.    So I will put the hob/stove on the island instead.
  • I will use the lefthand lower cupboard (which would normally have the hob/stove) against the wall, underneath the upper cupboard.
All of the kit units are constructed in basically the same way.  A simple box is constructed and painted.  The green paper is applied over the front side, then a laser-cut trellis-like grid is painted and glued down which gives cleverly gives the impression of faux drawers.  Open shelves are assembled and slotted into the simple box inside openings left for that purpose.  The hob/oven/microwave are pieces of wood painted black, with artwork applied on top to make them look like appliances.  This simplicity and lack of working drawers makes it easier to kit-bash the units (I am hoping).

Beginning to bash - Oven/microwave unit

1)  I cut the front trellis of the oven/pantry/refrigerator unit into thirds, carefully, with a sharp scalpel. The oven/microwave is the left piece, the pantry is the middle piece and the fridge (which I likely won't use) is on the right.


2)  Then I used the oven unit from step (1) to trace off the appropriate widths of the front and back panels from the original triple unit.  I cut these with a scalpel.


3)  I used the original side pieces from the original triple unit, and cut shorter pieces from the top and bottom unit to use for my new cabinet.

Then it was a simple matter of gluing together this rectangular box.


4)  The new slimmed down unit in its place, in the alcove.


Kit Review:  Petite Properties 1:24th Wall Cupboard

This is another one of the cheap cardboard kits that I used in the little girl's bedroom.  This one is for a front opening wall cupboard with one shelf, which comes with thin acrylic 'glass' and some knobs for handles.  It is superb value at £2.99 from Petite Properties here in the UK (http://www.petite-properties.com/)

As before, the good quality card (like mat board) is cleanly cut by laser, with additional etched detail on the doors, and the pieces fit together cleanly.  Having learned my lesson on the previous kits, I was very careful to bend each corner over a metal ruler, to get a clean bend with no delaminating of the card layers.

There are only four pieces:  the main cupboard all in one piece including the doors, a top and bottom, and a shelf.  It assembles very quickly into an attractive cupboard.


What I am thinking is that this will be a cupboard above my refrigerator, to make the refrigerator look more built-in.  It's a similar width to the fridge, but not as deep, so I will likely need to add false sides.


Bashing the left lower cupboard

I am going to turn this into my sink unit, against the wall, and I am going to include a dishwasher (another fridge magnet) as I can't imagine life without one.

1)  The front trellis includes a 'blank' area where the righthand lower cupboard would have butted up to make the 'L'-shaped counter from the original kit.  I trimmed this off.

Then I used the 'trellis' part to measure and cut the front piece, as well as the bottom piece.  I am not adding the top piece yet because my sink will need to drop down into the cupboard space.  I left the back full width, so that I will have support for the counter top and new side.


2)  I used the original sides from the lower cupboard and the original interior brace.  However, I have positioned the brace further to the left, in order to allow for my sink to be positioned directly underneath the 'extractor hood' on the upper cupboard.

You can see how the upper and lower units are going to overlap the oven unit, making it all look built in (hopefully).


3)  The dishwasher is going to go in the space that I left for it in this unit.  However, it's too tall so I am going to have to cut some of the base off.  This is a fridge magnet that has an opening door with interior racks that slide out.  I cleaned up on 1/24th scale appliance-shaped fridge magnets at a Fridge Magnet shop in San Francisco in the tourist area.


Shopping

Today my DH drove me up to Birmingham to visit the UK's biggest and best dollshouse show, Miniatura, as a belated Christmas present.  However, I had committed to only keeping him waiting for two hours, so I really had to whiz around.  I was basically glancing at stalls to see if they had anything on my list, and moving on if they didn't.

As you may have gathered, my favourite source for smaller scales here in the UK is 'In Some Small Way', and I was able to pick up a second LP sofa for my scantily-furnished living room, a saucepan, a teapot with matching cups and saucers, and two mugs from the lovely Judith.  On another stall, I picked up some charming vintage childrens packing items (boxed games etc.).  I found a faux 1/24th cardigan which will look nice in the Fairfield bedroom, and from Tee Pee crafts I picked up a bunch of findings which will hopefully be accessories for the little girl's room, plus a mirror frame for the hallway.  It was a whirlwind tour.  1/24th scale is still not widely available here in the UK.  There's a lot more than there used to be, but very few dedicated suppliers.  Typically a stall that sells, say, china or glass or plants will have one small area with a few items in 1/24th scale. 

So, I'm feeling good that I am finally tackling the kitchen kit bash and that I now have a plan.  Let's just hope it works...

Sunday, 13 March 2011

A nice place to sit

This week I have been making places to sit.  First of all, thank you to those who have voted on the best arrangement for the little girl's room (see previous post) - your comments have given me some great ideas.  If you haven't voted, please have a look and let me know what you think.

I put together the second Flutterbye Chair this week, so the set is complete.


Then I was working on the windowseat in the kitchen.  I cut two pieces of craft foam to fit inside the bay, and glued them together for a double thickness.

When I papered the kitchen, I had just glued flaps inside the window aperture, so it wasn't very tidy.  I painted some lengths of kebab stick to match the window, and after I took this picture, I glued them down the sides of the window to tidy up the edges.  I glued a leftover length of plastic skirting along the top edge of the opening to trim that. Although now that I've seen the high res photos (which show much more detail than my own eyes can pick up on) I can see that I need to touch up the paint on that a bit.


Then I made the cushion the same way as I made the outdoor cushions, by wrapping fabric around and gluing on the reverse.  On this cushion, I added faux piping around the front edge by twisting a single strand of embroidery floss into a doubled cord and gluing it on.

This fabric is probably a bit too large scale, but I really liked the colour in this room.

This will be a good place to put little throw pillows to make it really cosy. I might add a window treatment which would hide the untidy top edge - will have to think about that once the dining set is finished.

I am running out of things to procrastinate with instead of tackling the kitchen - am going to have to open those scary bags of a kazillion kitchen kit pieces soon.

Sunday, 6 March 2011

Decisions, decisions - girl's bedroom vote please

This week I put together the Flutterby Child's Bed, but I need to decide where to put the furniture in the girl's room.  I took pics of several different arrangements - let me know which is your favourite!

Kit review: Flutterbye Butterfly Collection child's Bed P040 1/24th scale

This little bed is a bit like a sleigh bed, only with a high headboard. This is a fairly simple kit to put together.  The pieces are cleanly cut by laser and with minimal charring:  two sides, headboard, footboard, bed base and tops for the headboard and footboard.  The supplied artwork is charming as always.

Tips:
  • Trace around the bed base onto cardboard before assembling the bed - the cardboard will form the base of your mattress.  The instructions say to do this at the end, but it would save time to draw the pattern now rather than trying to make a mattress base to fit later on.
  • The footboard fits between the sides but I found that my bed base was a smidgen too long, causing my footboard to stand slightly proud of the sides.  The artwork has concealed this, but a dry run would have been good to pick up this issue earlier and I could have sanded the bed base slightly shorter.
  • I decided to add a narrow shelf into my high headboard, because it looked like a bookcase to me.  I had a bed when I was little that had a handy shelf to hold books and an alarm clock.  I cut some of the spare wood from the kit surround to the same length as the headboard width, and decorated it with the spare artwork provided in the kit.  To begin with, I placed the shelf lower down but then I realised it was too close to the pillows, and moved it higher.
Following the instructions for the mattress, I used two layers of cotton quilt batting and covered it with scrap fabric.


I made some little pillows, the blue ones are about 1/2" square.  The pink one is smaller, and I need to glue some trim around the seam to hide the stitches.

Room arrangement

As the child's bed is child-size, I still have loads of space in this room even with all the furniture now complete.  I'm not sure how to arrange it.  I'm thinking of making a draped canopy over the bed of some kind.


I think this is my favourite arrangement.  It puts the full-size chest of drawers at the back, to minimise its size difference, and brings the cute wardrobe to the front.  Let's call this 'Arrangement A'


Arrangement B


Arrangement C


D


E


F
 - kind of like the dresser and the bed at the back like that.


G (same as A, except bench and bookcase swapped)


Looking forward to your views!

Sunday, 27 February 2011

Shutters

Haven't had much time this week to work on the Fairfield but I did get the shutters made for the front of the house.  These are made out of card. I decided not to make the shutters that the Miss LP house has on either side of the bay window as I didn't like them, so I've only made shutters for the two front Gothic windows.

I traced around the outside of my spare window onto thin card, and used a quilting ruler to draw a 1/8" inside border.  I first cut out the inside shapes.


Then I glued the thin card onto some thicker card (mat board), using a solvent-based cement.


Once the glue dried, I completed cutting out the shutters by cutting around the outside line, through both card layers.

I sealed the shutters by painting both sides with Multi-surface Sealer.  Then I started painting coats of Anita's Dusty Green acrylic paint.


I glued the shutters onto the front of the house with more solvent-based cement, lining up the bottom of the shutter with the bottom of the window sill.


They just need a bit of touching up with paint, and then that is the end of the exterior construcion.

I received my replacement Flutterby Chair kit and the Flutterby bed from Judith of In Some Small Way in the post this week, so I will be able to finish the furniture for the little girl's room.

I visited the Studley Grange Dollshouse Workshop outside of Swindon today, as DS had an all-day commitment in Swindon and we had to hang around waiting for him to finish.  However, they stocked almost exclusively 1/12th so I wasn't able to get anything for the Fairfield.  They had a lot of Dollshouse Emporium stuff, and some Reutters, Heidi Ott,  and similar.  The shop is part of a garden centre / craft village complex that aims heavily at the mums-and-children market, with a play area and children's workshops like painting pots.  There is also a very dilapidated Butterfly World next to the dollshouse shop.  It was a bit depressing, lots of dead or dying plants, debris, dirt etc. but the butterflies were amazing.  When the sun came out, they started flying around quite freely, all sorts of amazing colours and sizes.  There was also a meerkat enclosure outside with the most adorable baby meerkats, so we felt like we got our money's worth just from watching them.

Sunday, 20 February 2011

Hanging baskets and comfy seats

This week I have been working on the outside of the house, which seems an appropriate thing to be doing now that springtime is arriving here in the UK.

Seat cushions


I made seat cushions for the two little benches for the front porch, and for the bench I had already built in the back porch.  Later on I hope to have lots of attractive throw cushions on these benches as well.

I used craft foam and cut a basic shape for the bench seat, and then wrapped fabric neatly around the foam, gluing it down flat on the back.


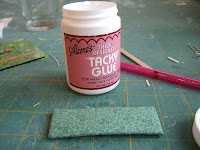
I really like this thick decorator's glue for gluing fabric flat.  It grabs immediately and dries quickly.


Hanging baskets


The February 2011 issue of 'Dollshouse & Miniature Scene' magazine had an article by Caroline Himmo-Brunson from the Itzy Bitzy Workshop on making 1/12th scale hanging baskets from polystyrene balls, with quite detailed paper-punched flowers.

I thought that was a great idea for my Fairfield so adapted the idea to 1/24th scale and to the materials I had on hand.

1) Caroline started with polystyrene balls, but I couldn't find those in a one-inch size which is what I felt would be the right scale for the Fairfield.  Instead I bought these rigid cotton balls.  The first step is to cut them in half.  I tried various methods such as razor saws etc. but what seemed to work best was a really sharp scalpel.  I scored along the cut line and then 'sawed' carefully through the ball with the scalpel.


2) The next step is to imbed a hanging hook.  With a polystyrene ball, apparently you could just plunge these in.  With my cotton balls, I found I had to pry up some of the cotton fibres from the centre of the ball, insert my hook with glue on it, and glue back down the cotton fibres to imbed the hook.

I cut the hooks from normal paperclips.


3) After the glue dried, I painted each 'basket' all over with green paint.


4) I put some dark-green medium flock in a bowl, smeared tacky glue thickly over the rounded outside of the 'basket' and pressed it into the flock to get an even coating all over.


5)  Then I started adding 'plants' to the basket, using a variety of scenic materials such as lichen, flock lumps etc.  I brought some of these down over the edge of the basket.


6) The final step was to add different colours of flower sprinkles as the 'blossom'.  I add these by using a toothpick to dab tacky glue over the 'plant' and then touch my moist finger to the sprinkles and hold it up to the glue.


To hang the baskets, I used some of those long pins intended for making earrings, that have a pin head at one end and are in fairly soft metal.  I drilled small holes through the beams, from the outside, poked through the pin and bent it down inside.  Afterwards I touched up the pin head with white paint.


Sunday, 13 February 2011

Interior decorating

This week I have been working on the internal decoration for the two children's room.

In the girl's room, I added the internal window frame. Unlike the windows on the replacement wall, which were in slightly thicker MDF, the girl's window is in the original Greenleaf plywood and therefore the Grandtline window frame protruded very slightly into the room. That meant that I couldn't just glue a card frame on top of the opening as I did for the other windows. I solved that by cutting the frame into two halves to put it around the protruding window, and adding a new 'sill' with a scrap bit of cornice. I painted this frame white to fit in with the pastel decor.

I added skirting to the two rooms, again using the plastic strip and leaving it white. I selected pale green velvet paper for the girl's carpeting, and pale blue velvet paper for the boy's carpet, and applied these using double-sided tape.  I don't have any furniture for the boy's room yet - so that is going to have to wait until I see something that inspires me.


I am going to make an upper curtain, somehow, to fit the gothic point of the girl's room, which will go on the top of the window. I didn't want to hide the rest of the window completely behind a curtain as the shape is so pretty, so I applied a half-curtain of pleated lace. I cut this from a length of pre-pleated nylon lace that I bought from Bluebell Miniatures some time ago.  I bought this lace in four different widths so I can use it in a variety of windows.  I still had to cut it down a bit to use it on the Fairfield window, so I ran a length of sewing cotton through the pleats first, before cutting it.


Front porch


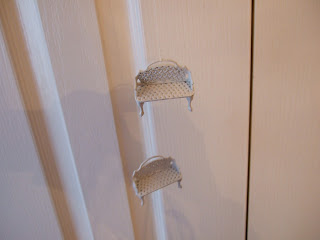
I had these two metal benches which are meant to go with the plastic light-up christmas houses you can buy in gift shops around Christmas-time.  They are a bit smaller than 1/24th scale, but they happen to fit perfectly into the sides of the front porch.


I sprayed them white by hanging them on a long thread, which I draped over a branch of our apple tree, so that I could spray them without having to touch them anywhere.

The next step will be to make some pretty cushions for them.  I'm also going to have a go at making some hanging flower baskets for the front and back porches.

Sunday, 6 February 2011

1/24th kit reviews: nightstand, bookshelf, chest of drawers

This week I was adding more furniture to my little girl's room, using three inexpensive kits that I bought at Miniatura.  But first of all, I finished off the Flutterbye kits by making up the clothes hangers and the basket.

The clothes hangers are absolutely minute.  There were no instructions, but what I did was to curve a hook from the supplied wire, and glue it with a dab of glue onto one side of the hanger.  While that was drying, I cut out the artwork, and then glued the artwork straight over the wire.  This worked great for the first hanger.  For the second hanger, I glued on the wire, cut out the artwork, put glue on the artwork, and reached for the hanger only to find that it had completely disappeared.  I looked for 10 minutes all over myself, the table and the floor, meanwhile with the artwork congealing on my fingertip.  I had to give up in the end.  However, my brilliant DH came home and heard my tale of woe, and conducted his own fingertip search.  He eventually spotted the wayward hanger, clinging to one of the struts of the table.  How it got there I have no idea.  These are gorgeous but now I'm scared of losing them, and have shut them in the wardrobe drawer. You will note in the picture below that while I was searching for the hanger, I did find the missing flower-shaped cupboard handle that I lost last week.  Sigh...

The basket is of printed paper, from the artwork included with the kits.  It consisted of a side piece, round outer base, round inner base (smaller), and a finishing strip for the rim, and a handle.  It was fairly straightforward to put together, and quite cute.


-------------------------------------------------------------------------
Kit Review:  Model Village Miniatures 1/24th Bed Side Table


This is an extremely reasonably priced kit for a basic nightstand, from Model Village Miniatures, which cost £2.95. As you can see, the pre-cut wooden pieces come in clearly labelled bags, accompanied by non-illustrated but clearly written instructions, and a colour photograph of the finished piece.  I painted the wood in the same colours I used for the Flutterbye furniture.

This is a dry assembly, so the top is off-kilter as otherwise the pieces wouldn't stand up for the photograph.  I found the pieces were accurately cut and fit well together with no sanding necessary.


-------------------------------------------------------------------
Kit Review:  Model Village Miniatures 1/24th Bookcase


Again, very reasonably priced at £2.50, and once again well labelled and packaged, and accurately cut pieces.


This is the dry fit, so top and base are off-kilter as they are designed to be centred on top of the sides - but if I tried to do that for the photo, the whole thing would collapse without glue.


--------------------------------------------------------------
Petite Properties 1/24th Chest of Drawers


This is a new line of laser-cut kits from Petite Properties, the brilliant UK builders of detailed and unusual 1/24th scale houses and 1/48th scale kits. I have one of their 1/24th houses, the Fisherman's Rest, which I turned into a tearoom.  At Miniatura they were showing a line of 1/24th scale kits which are laser cut from stiff card, similar to mat board.

The chest of drawers has one working drawer, and two false drawers.  The kit comes with the pieces shown, cut all from card, and six beads to use as drawer knobs (one of which I promptly lost, sigh... but I wasn't going to use them because they are black, so it was ok).

The pieces are very cleanly cut, and the instructions are excellent and very well illustrated.  However, I had some issues with getting a smooth paint finish on the card, particularly on the edges of pieces.  I found I had to watch the rectangular frames for the drawer fronts, as they easily became slightly warped in the middle so they didn't look exactly rectangular any more. The sides/front, and the base trim piece, have scored corners so that you can bend them into a box-shape.  This worked ok on the larger side/front piece, but I found the base trim started to peel its layers apart at the score mark when I bent it to shape. I didn't use it in the end, partly because the corners looked so crude.

I also found that my working drawer front didn't fit into the drawer cut-out in the front, and while it was relatively easy to shave the opening bigger with a scalpel, it was also very easy to bend the card front when putting pressure on it.

All in all, I felt the kit wasn't very robust and it felt more like a display model than an actual piece of furniture.  I think I prefer to work in wood. However, it was very cheap (£4.49 on their online shop) and there are many accompanying kits of furniture so you could furnish a whole house very cheaply - as long as you didn't plan to touch the furniture much once it was in place.

--------------------------------------------

I wanted my three kits to fit into my Flutterbye bedroom, so I decorated them with some leftover artwork and    low-res internet images.  I was surprised when I put them into the bedroom, at how giant they seemed beside the original Flutterbye wardrobe, table and chair.  But they look true to scale when I put them in the Miss Lydia Pickett bedroom.  I think it is because the wardrobe, table and chair are 'child sized', so are somewhere in scale around, maybe, 1/30th?