This week I have been working on the outside of the house, which seems an appropriate thing to be doing now that springtime is arriving here in the UK.
Seat cushions
I made seat cushions for the two little benches for the front porch, and for the bench I had already built in the back porch. Later on I hope to have lots of attractive throw cushions on these benches as well.
I used craft foam and cut a basic shape for the bench seat, and then wrapped fabric neatly around the foam, gluing it down flat on the back.
I really like this thick decorator's glue for gluing fabric flat. It grabs immediately and dries quickly.
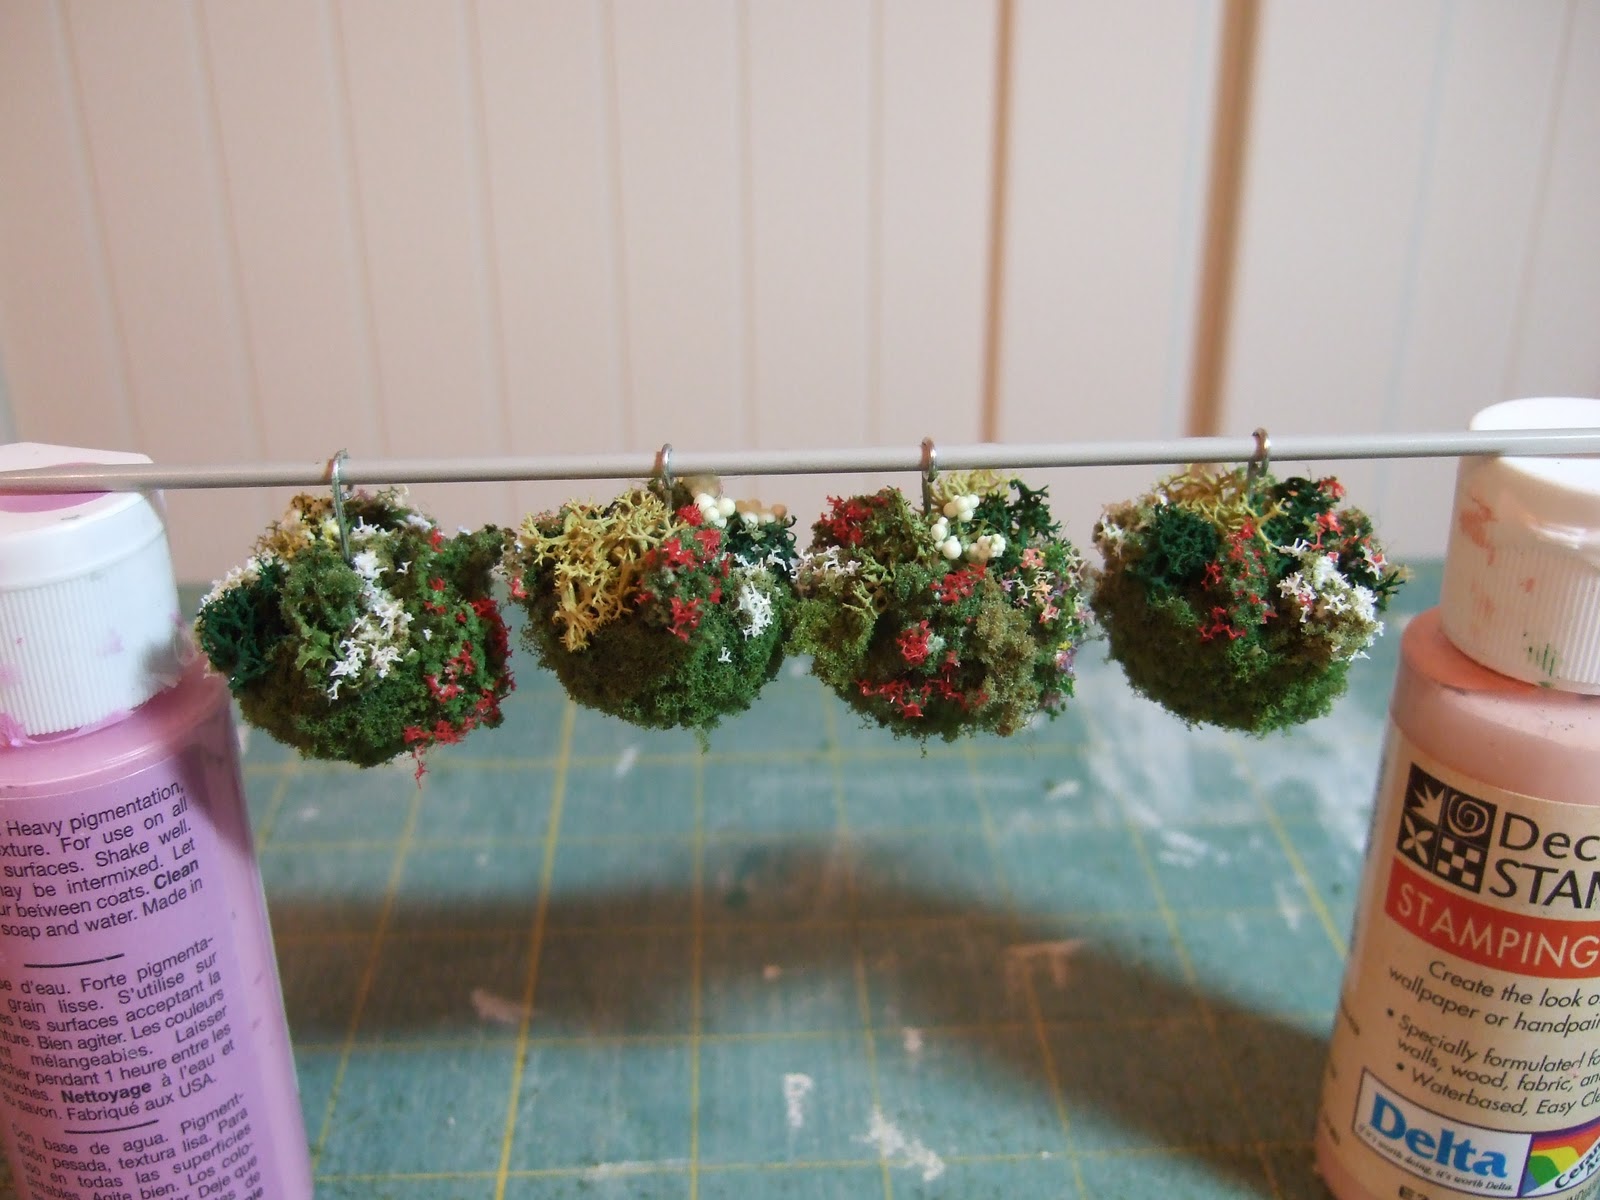
Hanging baskets
The February 2011 issue of 'Dollshouse & Miniature Scene' magazine had an article by Caroline Himmo-Brunson from the Itzy Bitzy Workshop on making 1/12th scale hanging baskets from polystyrene balls, with quite detailed paper-punched flowers.
I thought that was a great idea for my Fairfield so adapted the idea to 1/24th scale and to the materials I had on hand.
1) Caroline started with polystyrene balls, but I couldn't find those in a one-inch size which is what I felt would be the right scale for the Fairfield. Instead I bought these rigid cotton balls. The first step is to cut them in half. I tried various methods such as razor saws etc. but what seemed to work best was a really sharp scalpel. I scored along the cut line and then 'sawed' carefully through the ball with the scalpel.
2) The next step is to imbed a hanging hook. With a polystyrene ball, apparently you could just plunge these in. With my cotton balls, I found I had to pry up some of the cotton fibres from the centre of the ball, insert my hook with glue on it, and glue back down the cotton fibres to imbed the hook.
I cut the hooks from normal paperclips.
3) After the glue dried, I painted each 'basket' all over with green paint.
4) I put some dark-green medium flock in a bowl, smeared tacky glue thickly over the rounded outside of the 'basket' and pressed it into the flock to get an even coating all over.
5) Then I started adding 'plants' to the basket, using a variety of scenic materials such as lichen, flock lumps etc. I brought some of these down over the edge of the basket.
6) The final step was to add different colours of flower sprinkles as the 'blossom'. I add these by using a toothpick to dab tacky glue over the 'plant' and then touch my moist finger to the sprinkles and hold it up to the glue.
To hang the baskets, I used some of those long pins intended for making earrings, that have a pin head at one end and are in fairly soft metal. I drilled small holes through the beams, from the outside, poked through the pin and bent it down inside. Afterwards I touched up the pin head with white paint.


I think your entire house is the best mini thing I've seen in ages, and it just keeps getting better. Well done!
ReplyDeleteWow, great idea for hanging baskets! They look great.
ReplyDeleteI love your hanging baskets. I will give these a try. Thanks for posting.
ReplyDeleteVery inspiring ideas for making hanging basket - great tutorial! And the baskets really look wonderful hanging in place. I must look for the thick tacky glue - I haven't seen that type and it sounds excellent. Mini hugs, Sandie
ReplyDelete