
As you can see, the kit includes four units: an Upper Cupboard unit, left and right Lower Cupboards including a sink and hob, and a pantry unit including an oven, microwave and refrigerator. All appliances and drawers are false fronts. The kit includes the green wallpaper decorating the front of the cupboards, all the knobs, the sink and taps, and the grocery goods on the shelves. There's even a window and scene to go behind it, in case your room box needs a view.

I am going to try to kit-bash Judith's kitchen so that it looks more like the LP kitchen. However, my kit-bashed Fairfield kitchen has different proportions than the LP kitchen. So you can see why I have been procrastinating.
The plan
Having read through the instructions for Judith's kit which include helpful illustrations showing all the kit pieces, I've decided on the following modifications:
- I'm going to wrap my kitchen around into the righthand alcove, by dividing off the oven/microwave unit of the pantry cupboard, and installing it around the corner.
- I will position the refrigerator opposite the oven/microwave unit, in the corner of the room, and I will probably use a plastic refrigerator that I already own (it used to be a fridge magnet) rather than the faux fridge that comes with the kit.
- The remaining third of this unit, the pantry, will become a hutch in the righthand corner of the room.
- I will use the upper cupboard from the kit, and run it across so that it overlaps the oven/microwave unit.
- I will use the righthand lower cupboard from the kit (which would normally hold the sink) as my kitchen island, since it is shorter. I'm not going to put the sink on the island, as I think that if I lived in that house, I really wouldn't like having to wash dishes out on view like that. So I will put the hob/stove on the island instead.
- I will use the lefthand lower cupboard (which would normally have the hob/stove) against the wall, underneath the upper cupboard.
Beginning to bash - Oven/microwave unit


Then it was a simple matter of gluing together this rectangular box.

Kit Review: Petite Properties 1:24th Wall Cupboard
 This is another one of the cheap cardboard kits that I used in the little girl's bedroom. This one is for a front opening wall cupboard with one shelf, which comes with thin acrylic 'glass' and some knobs for handles. It is superb value at £2.99 from Petite Properties here in the UK (http://www.petite-properties.com/)
As before, the good quality card (like mat board) is cleanly cut by laser, with additional etched detail on the doors, and the pieces fit together cleanly. Having learned my lesson on the previous kits, I was very careful to bend each corner over a metal ruler, to get a clean bend with no delaminating of the card layers.


Bashing the left lower cupboard
I am going to turn this into my sink unit, against the wall, and I am going to include a dishwasher (another fridge magnet) as I can't imagine life without one.

Then I used the 'trellis' part to measure and cut the front piece, as well as the bottom piece. I am not adding the top piece yet because my sink will need to drop down into the cupboard space. I left the back full width, so that I will have support for the counter top and new side.

You can see how the upper and lower units are going to overlap the oven unit, making it all look built in (hopefully).

Shopping
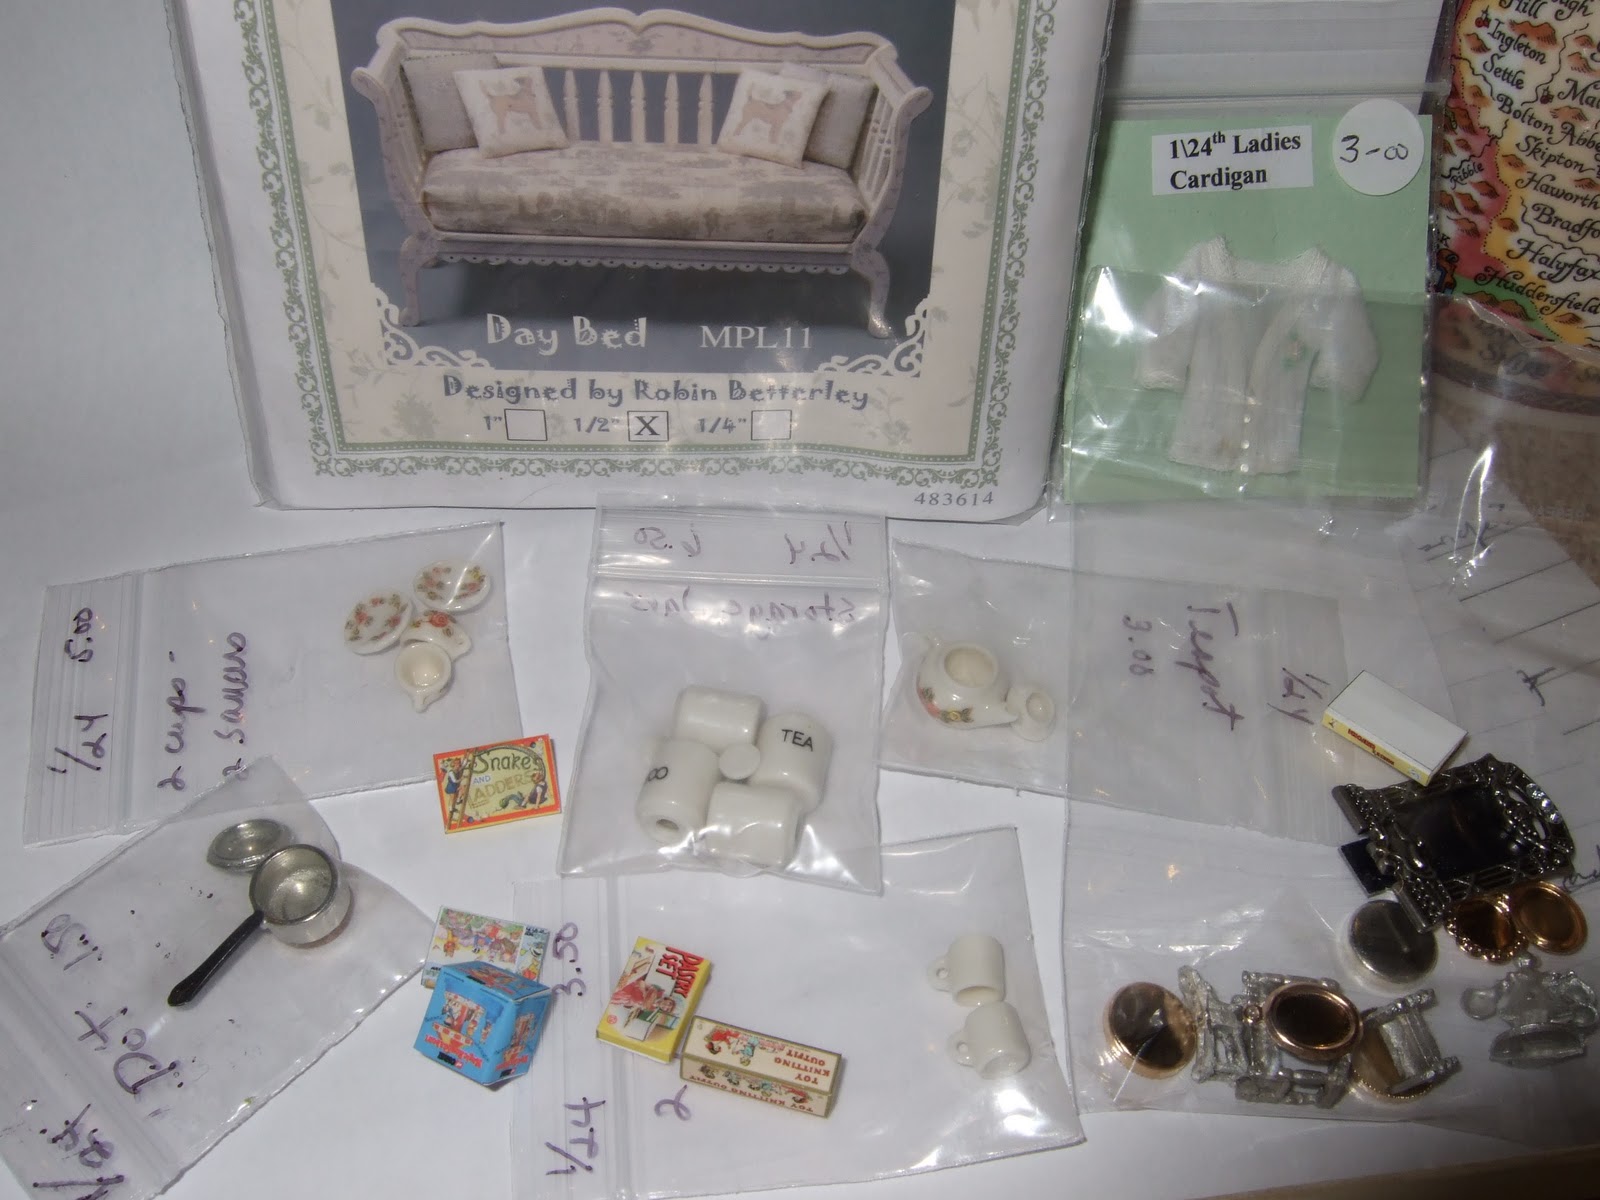
As you may have gathered, my favourite source for smaller scales here in the UK is 'In Some Small Way', and I was able to pick up a second LP sofa for my scantily-furnished living room, a saucepan, a teapot with matching cups and saucers, and two mugs from the lovely Judith. On another stall, I picked up some charming vintage childrens packing items (boxed games etc.). I found a faux 1/24th cardigan which will look nice in the Fairfield bedroom, and from Tee Pee crafts I picked up a bunch of findings which will hopefully be accessories for the little girl's room, plus a mirror frame for the hallway. It was a whirlwind tour. 1/24th scale is still not widely available here in the UK. There's a lot more than there used to be, but very few dedicated suppliers. Typically a stall that sells, say, china or glass or plants will have one small area with a few items in 1/24th scale.
So, I'm feeling good that I am finally tackling the kitchen kit bash and that I now have a plan. Let's just hope it works...

I'm using the magnet refrigerator in my Fairfield. I used the magnet stove too, and had to shorten the base to match my counter height, same as you will do to the dishwasher. I sanded mine down to the right height instead of cutting it, but I didn't have to take as much off as it looks like you're going to have to. Your kitchen will turn out fantastic, I'm sure.
ReplyDeleteNice haul from the miniature show. I'm headed to my first one next month...I'll be surprised if I find anything in half scale, I'm mainly going for fun since I have to be in the city on business anyway.
That is a great plan, good luck with your project:)
ReplyDeleteCareful planning has paid off, your kitchen is working out well. I am enjoying so much going back through all your posts and reading the process from the beginning!
ReplyDelete