Well, apart from support from Keli, there is a fairly resounding silence about my conservatory. I'm telling myself that you are all on summer holiday, and I am pushing away the little voice that is murmuring "they think it's awful!! they can see all the filler!! they think it's a FRANKEN-FIELD!!!" :) In my own defence, I would like to point out that the filler that looks so obvious on the front wall of the conservatory in those dreaded hi-res photos is not glaring at all in real life. I think it's the lighting in the photo magnifying the difference between wood-grain and sanded-filler.
Anyway, now that the conservatory is done, I have been able to finish off some of the details prior to moving on to the roof construction phase.

I glued on the bay window that I constructed earlier.
I punched out the Fairfield kit stairs and constructed them. But before I glued them together, I traced around tham on a spare bit of ply, and cut out a second stair for the conservatory.
Much sanding/filling/painting ensued, then I glued them in place.
I glued on a block of wood for the chimney base, using a scrap left over from the foundations. It wasn't quite thick enough to fit snugly, so I packed it with two coffee stirrers, then cut them off flush once the glue had dried. The joint still gaped a little thanks to my inability to cut straight, so I applied a little more filler after I took this piccy.
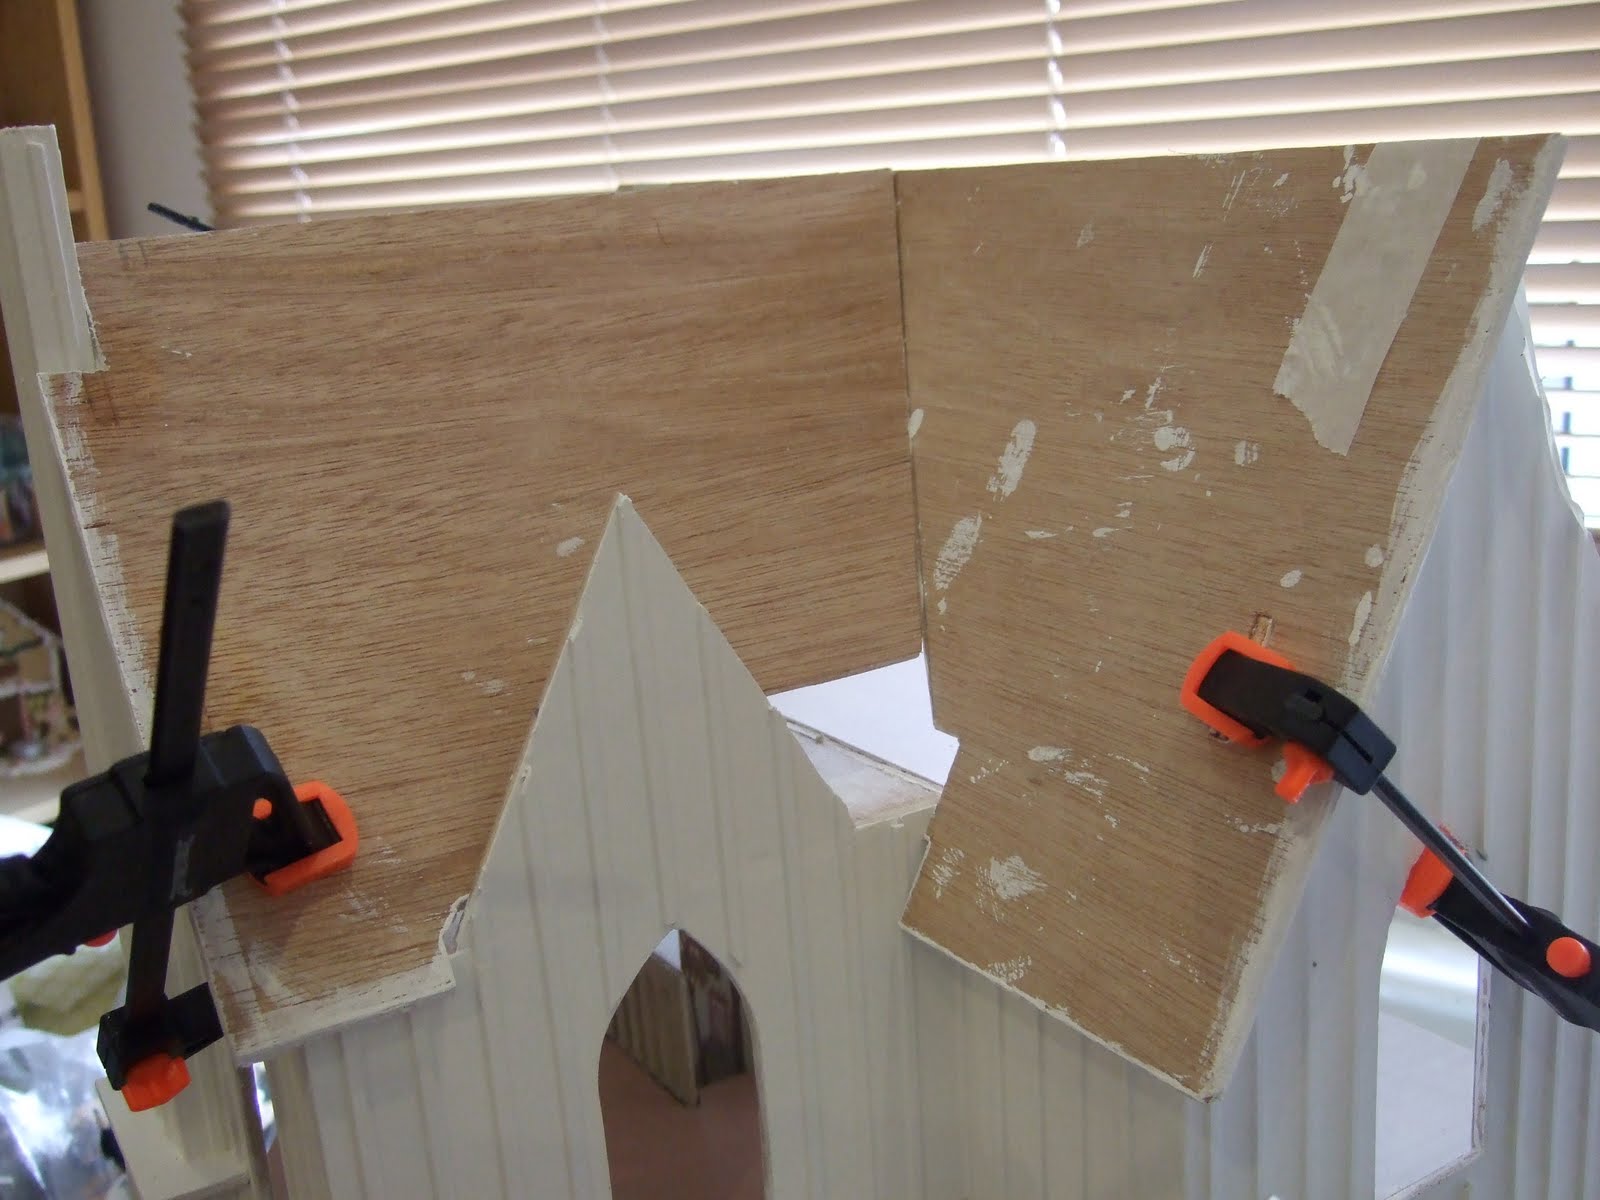
Then it was time to move on to the roof. The first step was to shave off the top of the back part-wall at an angle, so that the roof would fit snugly down the angled side wall.
I also cut pieces out of the front and back roof so that they fit around the new chimney.
Then it was time to consider the dormer over the front window. I knew this was coming, but I had mentally shelved it for later as being 'part of the roof'. I cut the dormer from some spare ply, matching the angle to that of the front wall. I suppose I could have included it as part of the replacement front wall from the beginning, when I cut that out. But somehow it seemed easier to wait until I could see how the house looked once it was put together, and how the dormer would relate to the roofline.

As this was virgin ply, I had to treat it as I had the kit pieces and do the sealing / sanding / gesso / sanding/ coats of paint routine. Then I glued it in place.

I braced the dormer addition from the inside by gluing on some scraps of wood. I had to be careful that these weren't too high, as they have to fit inside the cut-out of the roof piece (which normally would go around the Fairfield Tower). These scraps won't show as the false wall of the master bedroom will hide them from view.

There followed the usual filling/sanding/filling/sanding/painting tapdance. I decided I needed to pop off a few of the sticks on the front wall, and replace them with full length sticks that ran right up the dormer, to help it blend in. So I drew the guidelines on.
Then I stuck on replacement sticks, and applied more coats of paint over the dormer area. You can still see the join if you look for it, but I don't think it is very obvious at first glance.
While I was painting extra coats of white paint on the dormer, I was also painting white on the underparts of the roof that will show externally. When all of this was dry, I glued on the side roof, then the front roof. You can see that the front roof still has a cutout for the unused Fairfield tower. Some of this will be hidden by the dormer roof, but I am going to need to fill in some of this gap with spare ply.
 I glued on the bay window that I constructed earlier.


 As this was virgin ply, I had to treat it as I had the kit pieces and do the sealing / sanding / gesso / sanding/ coats of paint routine. Then I glued it in place.
 I braced the dormer addition from the inside by gluing on some scraps of wood. I had to be careful that these weren't too high, as they have to fit inside the cut-out of the roof piece (which normally would go around the Fairfield Tower). These scraps won't show as the false wall of the master bedroom will hide them from view.
 There followed the usual filling/sanding/filling/sanding/painting tapdance. I decided I needed to pop off a few of the sticks on the front wall, and replace them with full length sticks that ran right up the dormer, to help it blend in. So I drew the guidelines on.


An absolutely amazing job! The conservatory really looks as if it belongs, one would never guess it wasn't part of the original house! Can't wait to see the house finished and all the furniture in!
ReplyDeleteyou're doing a great job! Lovely to learn how you did it.
ReplyDeletehugs Karin
I loved what you did with the conservatory! I love everything you are doing. The only reason i didn't comment is Google was giving me a really hard time.
ReplyDeleteTruly i wait with bated breath for your next installment.
I think you are really amazingly creative. I have a Fairfield, awaiting construction. It is tempting to follow your lead. Thanks for all the inspiration.
This is my second post today. This is more exciting than the tv program LOST!
ReplyDeleteI can't wait to see what you do next. And when you are ready to furnish--that will be fun, fun, fun!!
Your work is amazing. I especially admire your creativity, your imagination, your attention to detail and dedication.
ReplyDeleteKeep up the good work! :)
Bah, don't worry about people not commenting...I've had a blog for two years and only have three commentors, when google analytics tells me I've got more readers than that.
ReplyDeleteI laughed when I saw that you duplicated your porch stairs on spare plywood for the conservatory...you've got my porch stairs, silly ;)
I was wondering if and how you were going to add the dormer. I'm impressed, it's looking fantastic.
Don't worry about the number of comments, the stats on my blog show so many pageviews per week, yet there are few comments. And as you can see, I am visiting and reading months (in fact more than two years)later, and enjoying it as much as if I were reading as you were building - and glad I don't have to wait for another day before I see the next installment lol. I agree, the conservatory looks as though it was part of the original kit. And don't worry so much - the flaws you are worried about don't actually show on the blog. We all know that things are magnified in the smaller scales.
ReplyDelete