I need to win the lottery so that I can give up work and have time for all my hobbies. This week I've spent a lot of time learning to use my new quilt frame, so I haven't done very much dollshousing, but I did put together a couple of kits.
First though, a couple of pictures I forgot to include last week. I had previously made the Miss Lydia Pickett wallhanging shelf, and the hall table, before starting to build the house, and finally they have a home. The shelf likely looks a bit odd straddling two different wallpapers but it doesn't fit in anywhere else in the house. I didn't want to put it in the living room as I like the wallpaper in there so much that it seems a shame to cover any of it up.
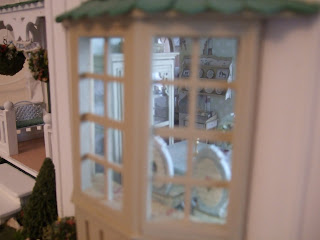
I like this view looking in through the bay window.
Miss Lydia Pickett Day Bed kit
I had already made one of these over a year ago, before I started the house build, but I bought another one at Miniatura to be a second seat for the living room. This is the kit: laser cut wood with lasered labels next to the parts, instructions, b&w photos of assembly, and a packet of printed fabric and stuffing for making the cushions.
However, the instruction sheet in my 1/2" scale kit was actually the instruction sheet for the 1/4" kit, which doesn't have the same parts. I don't know if I am just incredibly unlucky, or if there are some quality control issues with these kits. I know before when I was building the kits (prior to the housebuild), I got a kit with no photo sheet and had to go back to Judith to ask her to post me a replacement. Then I got the kit of two Flutterby chairs that only had wooden parts for one chair, and now a wrong instruction sheet. By looking at the pictures, and the Day Bed I had built previously, I was still able to put the kit together, but it was a bit fiddly as it wasn't clear what order to apply the leg pieces with the notches in them. I started out by gluing in the seat as per the 1/4" instructions, but I think maybe I should have glued on the back leg trims first. I had to slide them in afterwards, and ended up blocking one set of notches for the side pieces by accident. Also, the 1/4" instructions don't mention the back trim pieces at all, so I had to puzzle out where two of those went. Anyway, I got there in the end.
Petite Properties 1/24th Glazed Tall Cupboard
This is another one of the very reasonably priced kits from Petite Properties, laser cut from cardboard. I'm going to put it up on the mezzanine beside the grand piano.
They go together incredibly easily. The pieces are very accurately cut, and the card grabs the tacky glue for an almost instant join. It was just a case of gluing in the five shelves, folding up the sides and gluing them to the sides of the shelves, and then gluing on the top and bottom.
Sunday, 5 June 2011
Subscribe to:
Post Comments (Atom)


Me encanta tu cocina, tiene mucho estilo y es preciosa. Enhorabuena!!
ReplyDeleteI love how your kitchen came out and I really love that shelf!!! It came out so nice.
ReplyDeleteWhat fantastic furniture! They are little jewels!
ReplyDeleteAnd I like your idea about winning the lottery -- me too!
Patchwork is another hobby we have in common! I'd love a quilting frame but a) don't have room for one and b) cannot for the life of me master stipple quilting! I have a gorgeous quilt for my bed that I'll have to send out to have custom quilted and it will cost a fortune.
ReplyDeleteI always keep the instructions for my kits and file them (um, that's the theory anyway) in a loose-leaf binder so that I can refer back to them if I buy a second one and get the wrong instructions or break a kit and have to repair it.
Isn't the plate rack with dishes a lovely kit? And the little table is too.