Wow, thank you for all the comments! I love getting comments, and it is so nice to be on the receiving end of so much support. As I said to a few of you, my family, although supportive in a passive way (not complaining too much about having the dollshouse in the kitchen, for example) are not very interested. DH has looked at it a few times to see how I am doing, but he is not a miniaturist and doesn't get excited about the finer points of construction. So it is lovely to have a community of fellow... fellow what? Fellow obsessives? Fellow mini-architects? Fellow thwarted period house owners? :) Anyway, thank you!
This week I finished off the dormer roof then had to make some decisions about the attic floor layout.
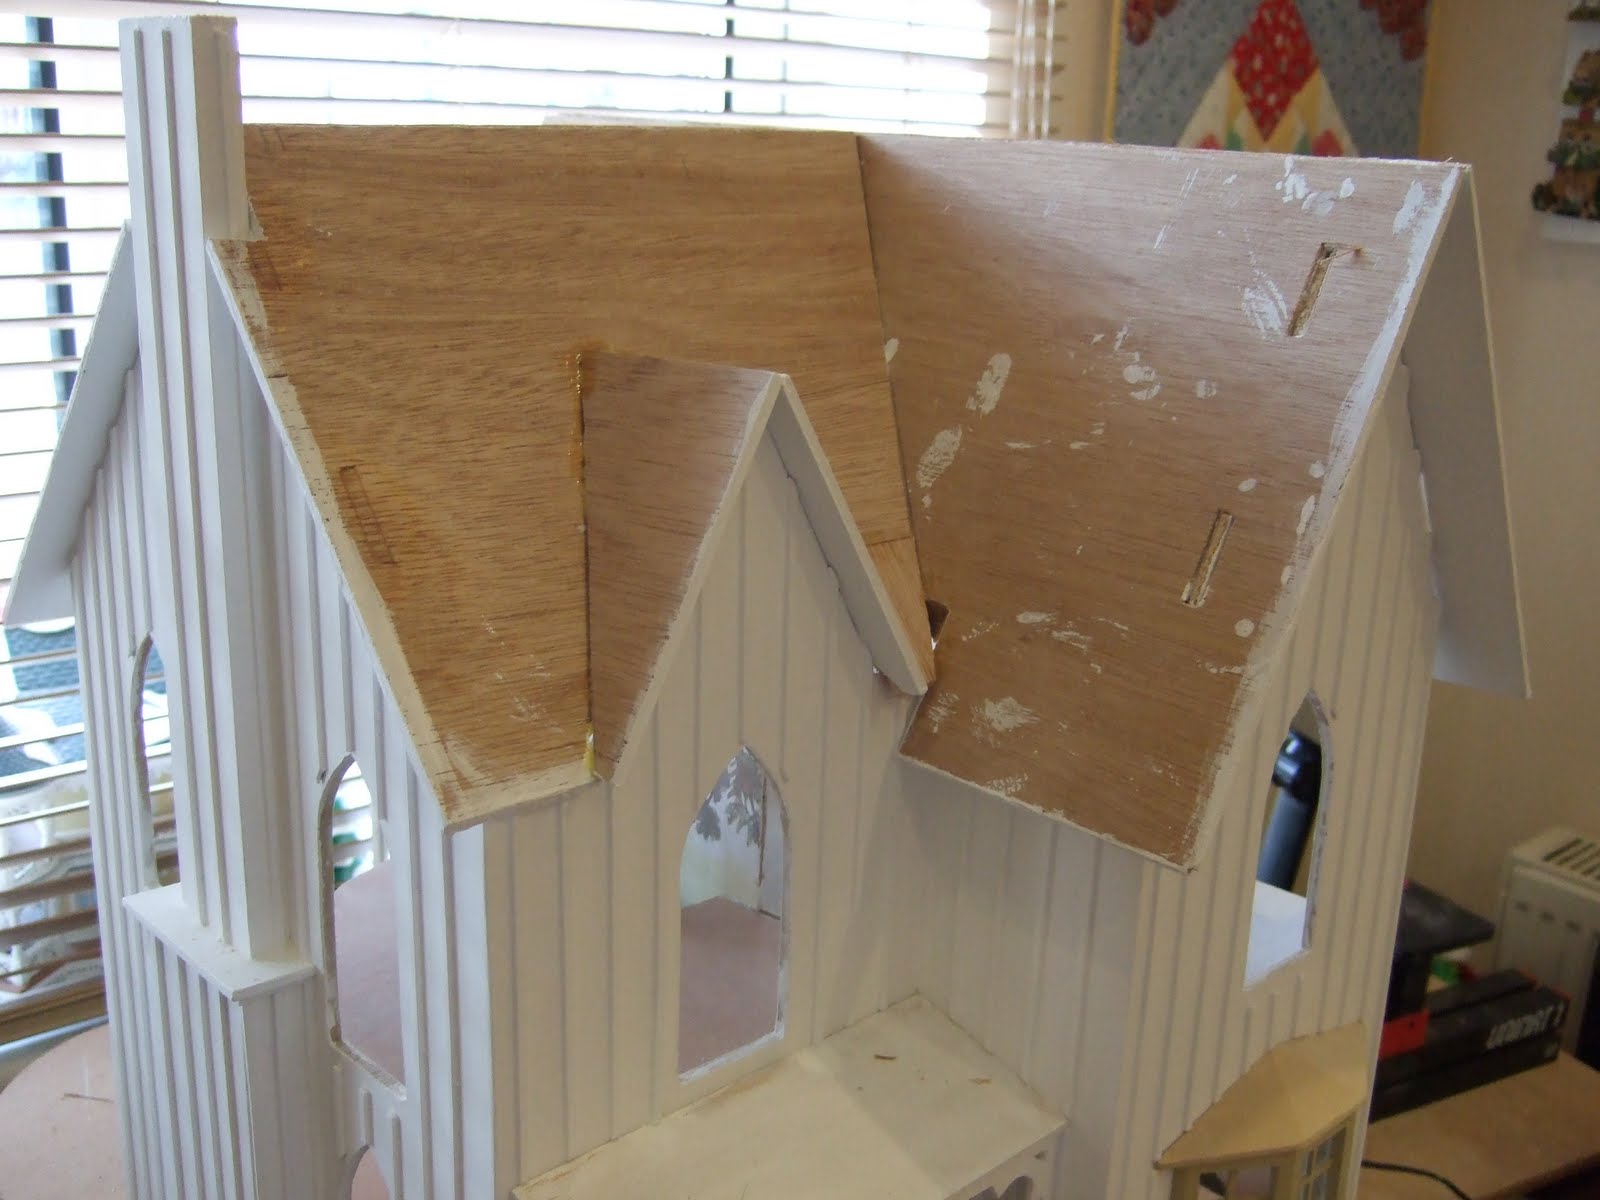
To patch the cut-outs in the roof (where the Fairfield Tower would have been), I started out by making a pattern out of cereal packet, trimming until I got the right shape. I could draw from the inside of the roof to get the cut-out shape correct.
Then I cut the piece out of scrap ply and glued it in. I used a straight edge to ensure the piece was at the same angle as the rest of the roof.
I glued a piece of thin card across the inside seam to add strength, although it isn't likely that this patch will get knocked as it is in a protected position.
Then I filled in the small corner cut out in the main roof with a little ply corner cut from scrap.
To make the dormer roof, I started out with more cereal packet to make a pattern. I measured the overhang to be the same depth as that of the side roof, then started trimming the angle until the top of the dormer was horizontal. Once it was correct, I cut the pattern in half and traced it out onto scrap ply and cut it out with the Unimat saw.
As this was virgin ply, I sealed it with spray-on sealer, and did the gesso/sanding/paint routine on the overhang.
Then I glued them into place.
Interior Design
Then it was time to start thinking about the interior layout and false walls of the attic floor. Originally I was going to copy the Pickett Hill (PH) layout, which has one enormous bathroom across the side with a false door leading nowhere, and a medium size master bedroom with its own false door. The suggestion is that there is an unseen corridor behind both doors. (and for some odd reason, there is a desk in the bathroom. Wouldn't you just love doing your paperwork as you gazed out the round window, with people flushing the toilet and having showers behind you....) I tried out some of the bedroom furniture in the house and tried to get enthusiastic.
I glued in the false side wall that I prepared earlier. Then I was eating my breakfast the next morning and looking at the house, and was struck by how interesting the view was from the bathroom through to the master bedroom, with all the interesting angles, and I was thinking how cool it would be to have a bedroom like that.
So I started experimenting with cardboard walls and furniture, to see if I could come up with a layout that I liked better. I was trying to see if there was a way to include the round window end of the bathroom as part of the bedroom.

I used a 1/24th Coombe Crafts doll from my Fishermen's Rest Tea Rooms to check the head room clearance for an inhabitant to walk through from the bedroom into the study/dressing room with the round window. As I haven't actually assembled the Lydia Pickett bathroom yet, I have some leeway. After some experimentation, I came up with this layout. My plan is cut the sink-back at an angle so that it fits against the angled inserted wall. Positioning the door in the corner means that it can be a real door that opens into the bedroom, turning the bathroom into a deluxe ensuite. Of course, this means that we must imagine that there is a family bathroom somewhere else in the house, but as DH pointed out, there could be a whole unseen extension coming out of the cut-away wall which could contain useful things like attic access stairways and family bathrooms.

Having decided on a plan, it was time to cut the new walls out of foamcore (or foam board, as the slightly xenophobic clerk at the stationery story insisted is the correct term for it in the UK). The height of the false walls is about 1/4 inch higher than the door frames. I traced the angle for the new insert wall from the point of the side wall onto some more cereal packet, then trimmed and folded until I had the correct shape to use as a pattern. I cut the top of the rear wall at an extreme angle so that it tucks snugly under the angled roof, and I cut out the door opening to fit around the door frame.
Then I glued it in, and glued in a scrap wood brace behind it to strengthen the join.
I checked for right angles while the glue was still wet, using a small quilter's acrylic ruler. I use my quilting rulers a lot in dollshousing, they are brilliant for checking that things are square, or for cutting slices/squares of wallpaper, marking plywood for cutting etc. I use a metal straightedge for actual cutting though, as a knife could shave the edge of the acrylic ruler.
The bedroom wall was executed the same way, and again with a brace behind it.

How cool is this room going to be? I just want to move right into this house.


 How cool is this room going to be? I just want to move right into this house.
Love the renovation!! That's really interesting bedroom furniture you are using. Love the style of the bedroom furniture. Thanks for sharing your work with us.
ReplyDeleteOh I love this last picture, how much work you have done is amazing. It makes me want to start work on my fairfield that's sitting in my closet.lol
ReplyDeleteSpectacular!!! The furniture really looks at home in your version of Pickett Hill.
ReplyDeleteI think i will get a quilters square, by the way.
Absolutely brilliant idea for the beadroom! I must admit that if I could redo the attic spaces of my PH, I would have moved the master bedroom into the bathroom. That room is so big, and I've also always thought it a bit weird to have a desk in a bathroom......
ReplyDeleteYour room placement is very clever, if you didn't have the furniture sitting in place I wouldn't believe you found that much room in the attic.
ReplyDeleteI love the view of a another room through a door.
You've got me eyeing my Fairfield with renewed possibilities...
fabulous!! love it all!! especially the conservatory :D wonderful inspiration :D
ReplyDeleteWhat a brilliant idea! I love the idea of a dressing room, and swapping the bathroom and bedroom. I must dig out one of my quilter's squares and keep it in my dollshouse tools - keeping things square vertically would be so much easier.
ReplyDelete