Wow, the Blogger widget says that 61 people are following this blog now. I am really tickled that there are over 60 people out there (plus the occasional visitors) who are interested in 1/24th scale, or in the Greenleaf Fairfield house, or in Lydia Pickett, or maybe in all of it! And no pressure... :) But seriously, I do find it very motivating to have an expectant audience, it encourages me to do something every week so that I have something to blog about. And I love getting your comments. It's especially nice when someone says that they have learned something from reading, or have been encouraged to try something new.
This week I have been working on the landscaping, and I tried something new for me, thus the 'adventure' in the title.
Finishing the garden feature

I painted my garden feature to look like stone, using washes of acrylic paint in 'stone' colours, and painted the 'dirt' in Burnt Sienna.
Then I had fun 'planting' it with a mixture of scenic materials, Flowersoft (tiny paper shreddings that look like flowers), and a little tree from my stash (with added Flowersoft). I glued everything in with Aileen's tacky glue.
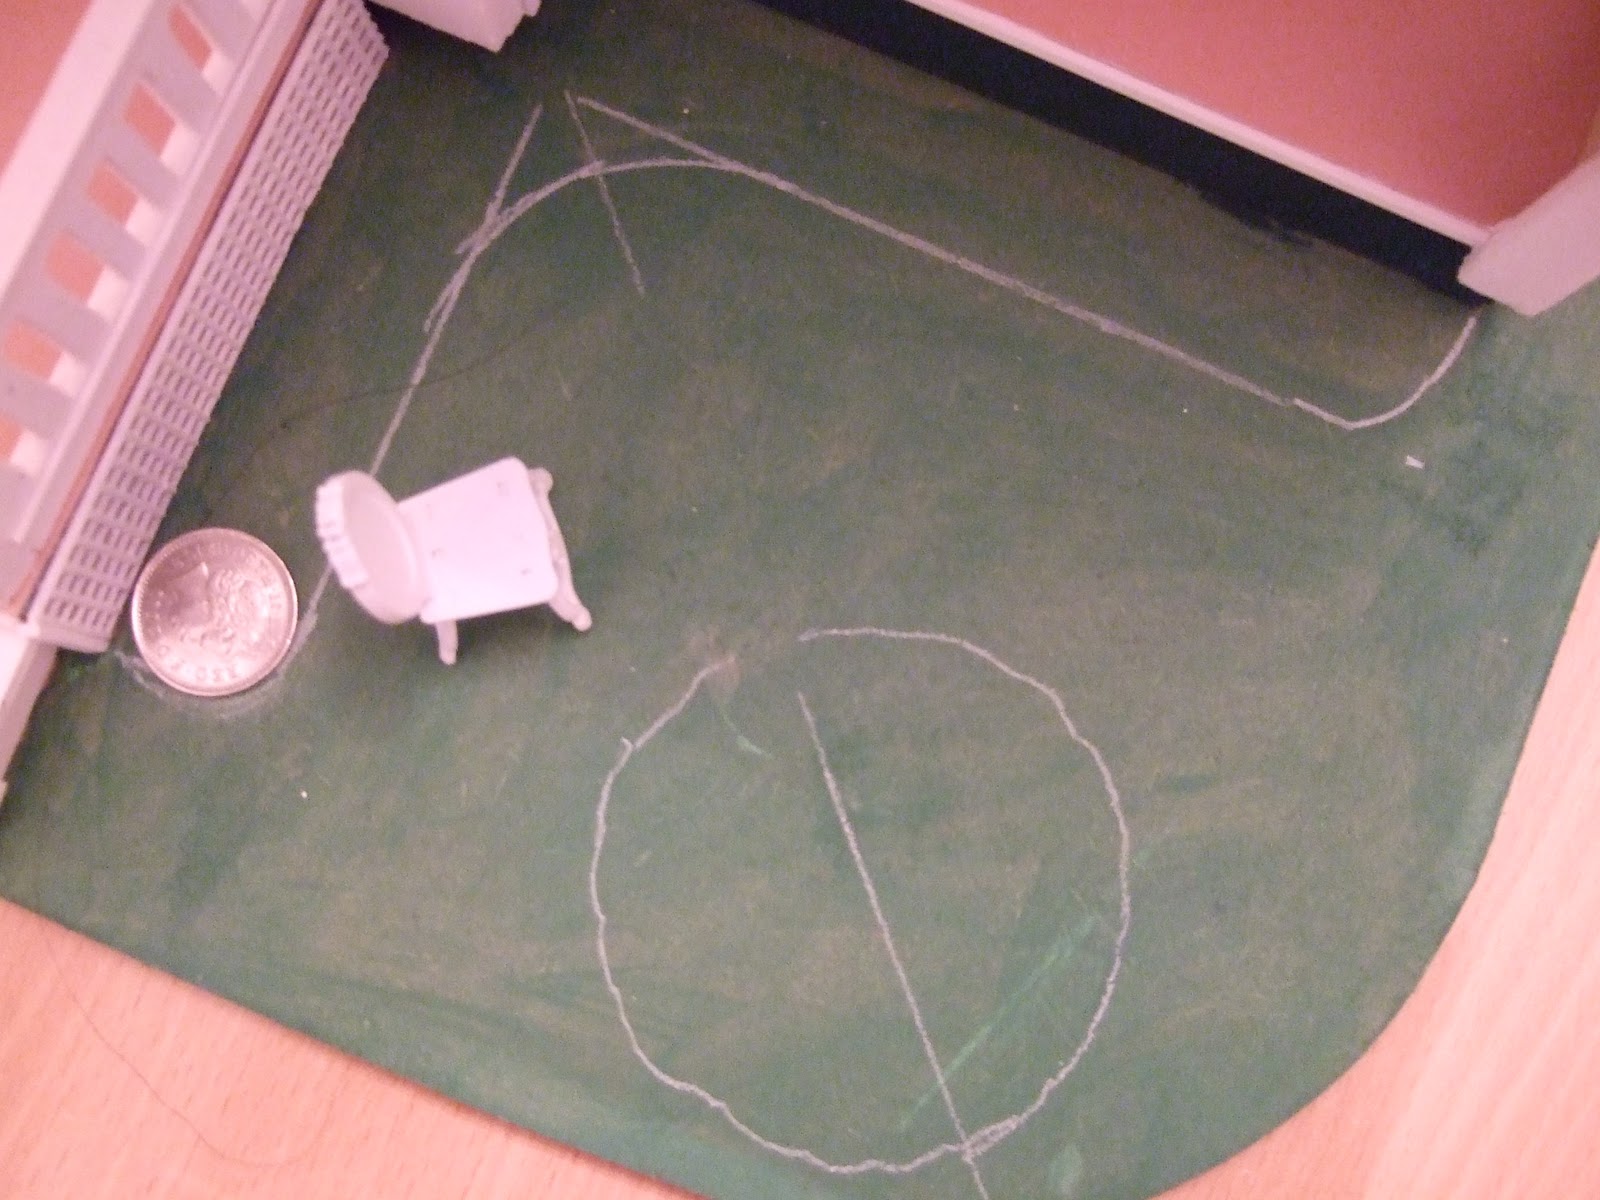
Planning the garden, and adding grass and dirt
I used a quilter's chalk pencil to draw directly on my base for the outlines of the flower beds. That way I could rub out lines and try again until I was satisfied. I used a 10p coin to round off the ends of the beds. I wanted to leave enough room between the beds and the garden feature so that I can have a couple of deck chairs.
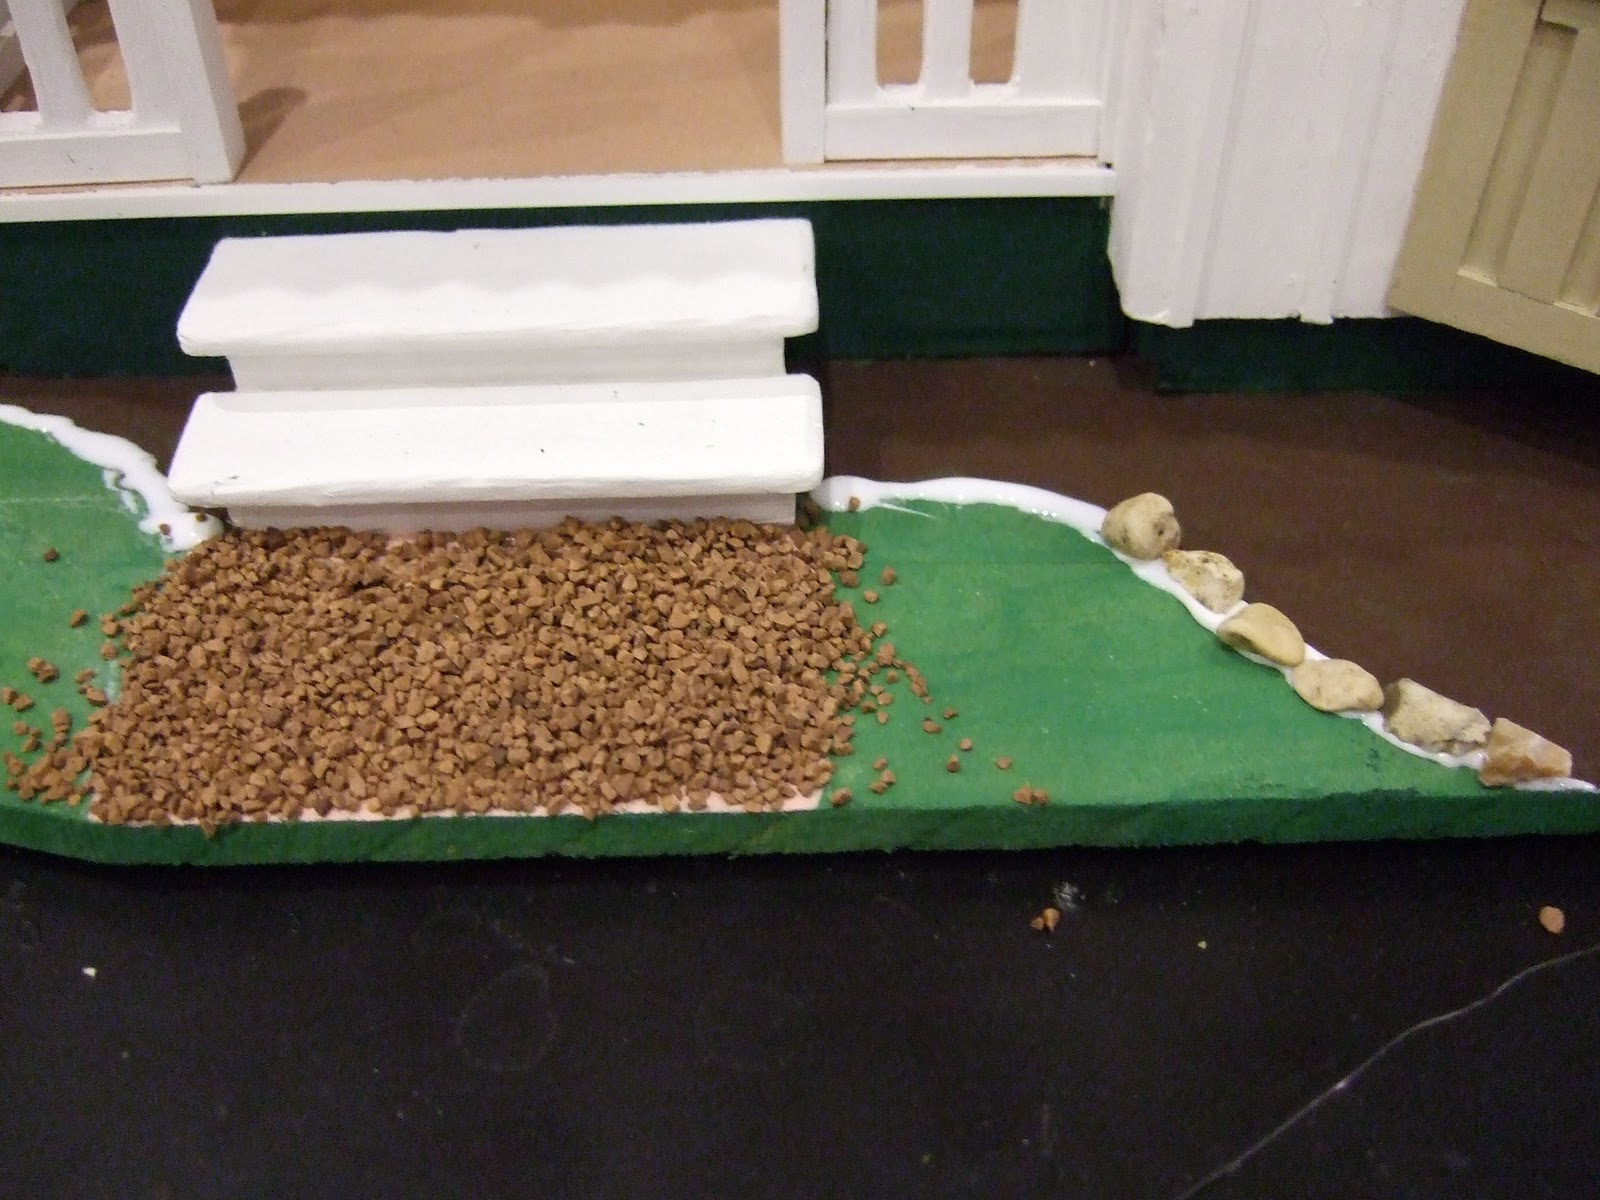
Then I painted the 'dirt' brown with Burnt Sienna acrylic paint. On the front, I painted the path in a very light pink.
On the front, I made a little border for the flower bed using small stones I scrounged up from our real garden, setting them into a bead of tacky glue.
I also started the path, by painting diluted PVA glue onto the path and sprinkling thickly with 'gravel'. I let this dry, then turned the house on its side and rapped the base so that the excess chippings fell away. I used the same method for the 'dirt' and the 'grass'. If you knock the excess onto a big sheet of paper, you can carefully pour it back into the bag to use another day.
Here is the front after applying the dirt and grass, using scenic materials such as those sold for model railways. I am lucky to have a DH and DS who do wargaming, so we have a stash of these materials. You can see that I need to glue on a few more chippings as they didn't cover right to the front of the path. By doing the stone border first, it is now partially covered by dirt on one side and by grass on the other, which makes it look more realistic.
I flocked all around the house. For some reason, the back lawn came out a bit streaky and I had to re-do some patches. DH says it looks like I have a mole problem... The grass flock has helped to make the garden feature look like it is bedded in, but I will still need to add some material around it to complete the illusion. I also added a bit of white Flowersoft to look like daisies in the lawn.
Making trees from scratch
I used up my last tree on the garden feature, so I was Googling to buy some more. I wasn't finding what I was looking for, but Google threw up a link to this
YouTube video which shows a man making really great trees using wire, fluff, and an electric drill. I couldn't believe how easy it looked, so I headed out to the bargain store and bought a cheap broom with thin plastic bristles for £2.99. I already had a pack of thin florist's wire.
I'd never tried this before, so I had to do quite a bit of experimenting, but as the materials cost practically nothing, it didn't hurt to throw away the disasters. You need a drill that will turn slowly, and I found that our cordless screwdriver was the best one to use as it will turn quite slowly. I found that my plastic bristles stayed in the wire better if I ran some glue along the lower wire first, before laying down the bristles I cut from the broom head. The block of wood supports the wire while I am doing this, then I would bring down the top wire, hold the two wires with pliers, and remove the wood block while I started spinning the drill. You can see a few of my efforts leaning against the front of the block.

After making several trees, I dipped them in various colours of green paint, and brushed off the excess (which I scooped back into the paint bottles, so it wasn't wasted. However, when I did the flocking, I found it covered the trees so completely, I'm not even sure I needed to do this painting step. Although it did thicken up the branches and trunks. I left the wet trees to dry on a tray on top of the radiator.
Then came the fun part! I gave each tree a good spray with Spray Mount adhesive, and dipped each one into a bag of flock. Thicker flock covered the tree completely and gave the appearance of a bush. Thin flock clung to individual bristles to look more like a conifer. I was really pleased at how well these turned out. I even sprayed and flocked a cheap plastic tree I got for .50p at the Kempton Dollshouse Fair today, and it looked hugely better afterwards. I might add some Flowersoft to some of these, to look like blossom.
 I painted my garden feature to look like stone, using washes of acrylic paint in 'stone' colours, and painted the 'dirt' in Burnt Sienna.


I LOVE your planter! Your landscaping is coming together so good. Thank you for the tutorial for the trees.
ReplyDeleteWow, you have been busy! Your landscaping is looking fantastic. Well done on your garden bed, the stones look very realistic.
ReplyDeleteWhat a great method. Thanks for that link, I'll follow it up. The trees have turned out really well and it's generous of you to share your method. Mini hugs, Sandie
ReplyDelete