It has belatedly occurred to me that I have been describing the extension on the back of the house as a 'conservatory', which is the common UK term for a glassed-in extension allowing sunlight to enter the house, a place to grow plants etc. However, I recall from chatting with Americans on #Quiltchat that this isn't a commonly used term over there. So perhaps I should have been calling it the 'back porch'. Which somehow doesn't seem as elegant, so perhaps I will stick with 'conservatory'. Or 'greenhouse'?
Anyway, you just want to know how I have been getting on :)

So, after last week, I painted the three sides of the conservatory white, and painted the base green. I applied scrapbooking paper to the top of the base to match the flooring used on the ground floor of the house, and sealed it with multipurpose sealer. I then cut slots into the base to match the tabs protruding from the bottoms of the side pieces. This is a picture before I applied the scrapbooking paper, while I was trying out the tab/slot fitting.

At this point, I took time out to cut out a base for the entire project. This is made from MDF which is slightly more than 1/4" thick. I played around with the positioning of the house and conservatory, and decided to keep the open back flush to the base's back edge, with the idea that this edge will be against the wall when the house is displayed. It then made sense to round off the two 'front' corners for a symetrical and smooth appearance. I drew the round corners using a small plate as a template, and cut out the shape with a power jigsaw. The base measures approx. 13.25" x 21.5". I purposefully left room on the conservatory side to allow steps down from the conservatory. It has kind of bugged me that in the pictures I have seen of the original Pickett Hill (PH) kit, there are no steps down from the entrance to the conservatory - which makes me think of the inhabitants having to leap down a couple of feet when they want to get into the garden... Similarly on the front porch side, I have left room for the front porch steps (not built yet) and the bay window protrusion.
The final step on the porch was some more coats of paint, and then finally to glue it all together and onto the base. Here I could pretend that this operation went perfectly and that I quickly moved on. But in the interests of transparency, and to show newer builders that everything does not always go as planned, I will reveal that I actually had a mini disaster. I had the three sides all glued together and heavily clamped, and sitting squarely on the base. Then I thought "I will just press down firmly to make sure the sides are making good contact with the base." SNAP, SNAP, SNAP.... Yes, the front arch cracked into two pieces, and the right side arch splintered off both supports.
I had a brief moment thinking of my incredibly stupidity, then realised that I had mere minutes before the glue started drying. DH was out in the garden and was startled to see me sprinting past on my way to the knitting shed to retrieve two clamps that I had been using to assist my machine knitting. Back in the kitchen, I generously applied glue into the splintered 'fingers' of the breaks, and pressed them back into shape, and clamped them together. I clamped the broken front arch back onto its back brace, applying more glue, and checked that the structure was reasonably square. Then I walked away and let everything dry.
Miraculously (and in testament to the gap-filling powers of Aileen's Tacky Glue), it came out reasonably well. I had to do a little bit of careful sanding and filling, and some more painting, but the breaks are not obvious unless you look hard. Whew! (I didn't purposefully take this picture from the non-broken side, honestly....)
Once I had the base structure, I could start thinking about the roof. I had several lengths of laser-cut trim (Northeastern Scale Lumber GBA-1, obtained through Judith of 'In Some Small Way'). I worked out where I would cut this for roof beams, which also showed me the angle I would need to draw on the house for the roofline. In order to avoid wasting my expensive laser cut trim, I applied coffee stirrers onto the house to mark the roofline. Then I started sticking sticks down for the vertical battening, in the same manner as on the rest of the house.

Now it is just a case of coats of paint, both onto the house and onto the roof beams. I primed the roof beams with a couple of coats of white spray paint, and am carefully dabbing on the white house emulsion with a small brush.
Welcome
I want to say 'welcome' to the new followers to this blog. I don't think I have said before about how motivating it is to know that people are interested in what I am doing.
There is some motivation already to press on with this project, because it is on our dining table and the family will only be patient so long about eating at a picnic table. But I know I am getting more done because I feel like I need to have something to show you all each week! So thank you very much for your support and encouragement, it is much appreciated.
 So, after last week, I painted the three sides of the conservatory white, and painted the base green. I applied scrapbooking paper to the top of the base to match the flooring used on the ground floor of the house, and sealed it with multipurpose sealer. I then cut slots into the base to match the tabs protruding from the bottoms of the side pieces. This is a picture before I applied the scrapbooking paper, while I was trying out the tab/slot fitting.
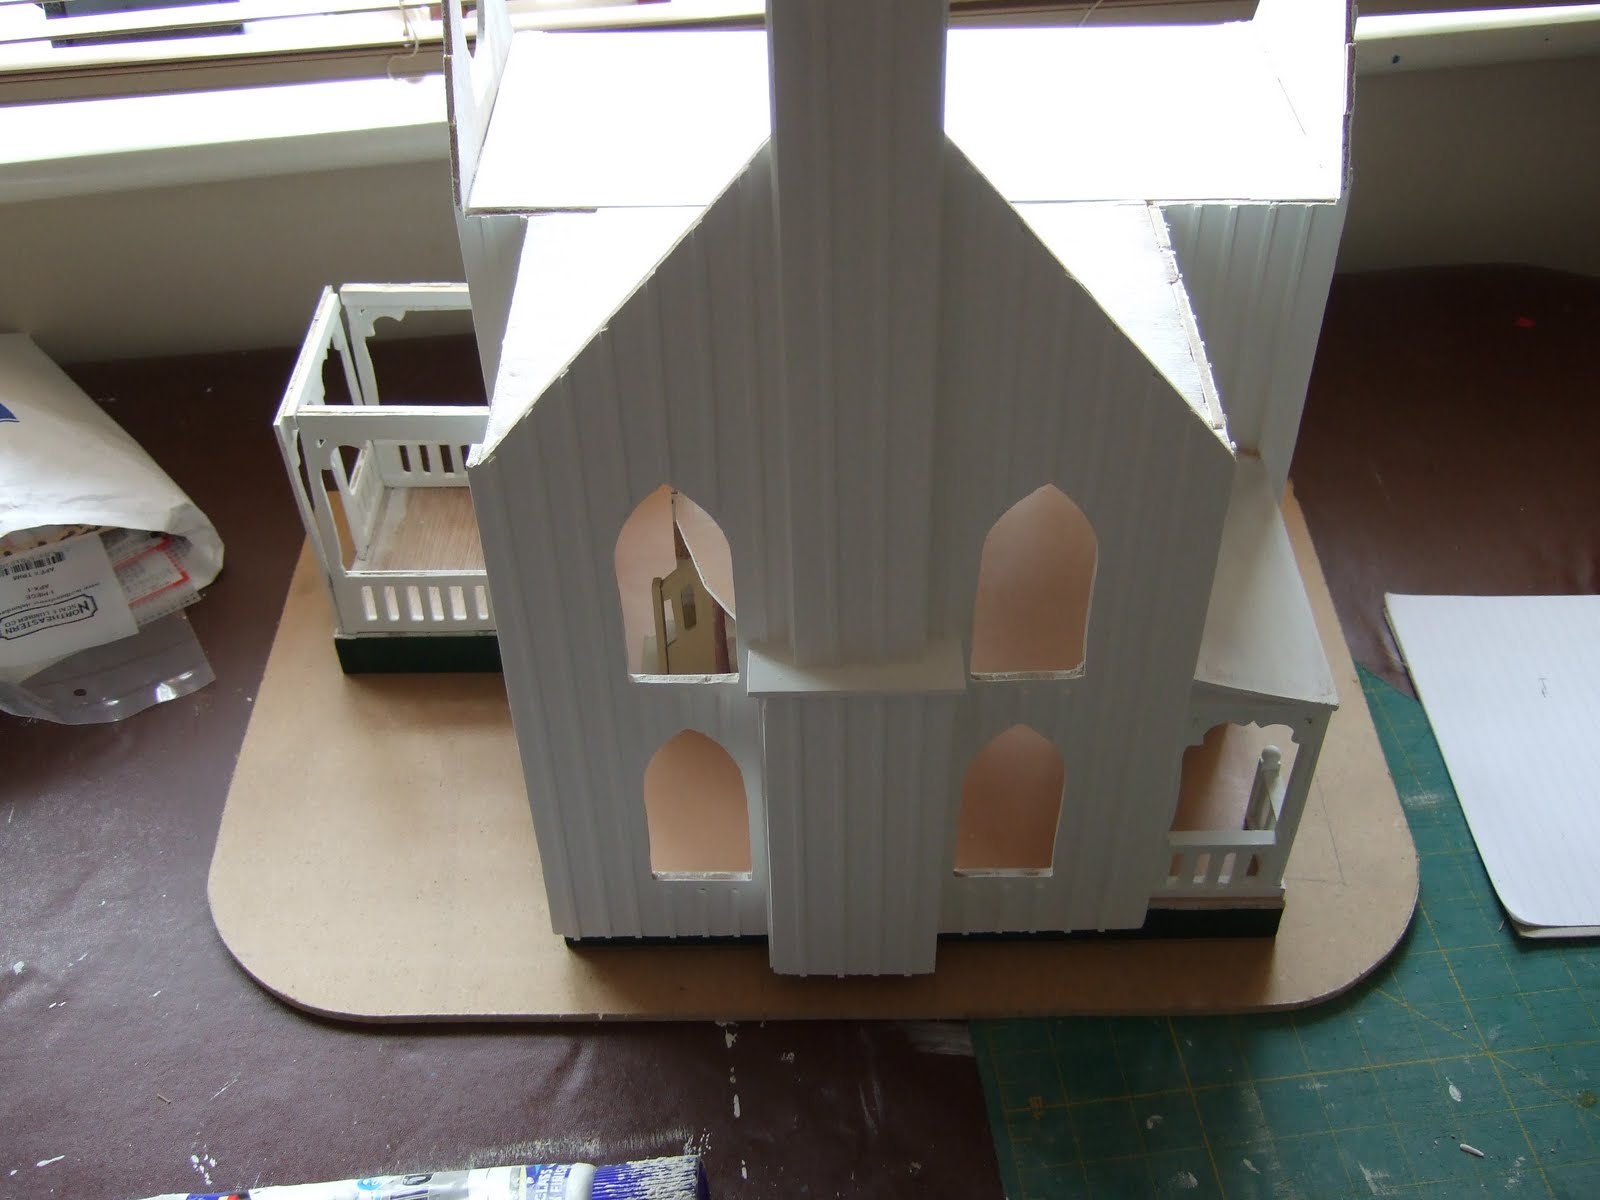


 Now it is just a case of coats of paint, both onto the house and onto the roof beams. I primed the roof beams with a couple of coats of white spray paint, and am carefully dabbing on the white house emulsion with a small brush.

Love the Gothic architecture in your project. It reminds me of a house I visited in my area several years ago. I remember taking a picture. I'll have to dig out that old picture and post it on my blog. At the time I photographed it for future inspiration, and you have reminded me that it's a fabulous architectural style. Thanks!
ReplyDeleteGlad to know I'm not the only one to have disasters ;)
ReplyDeleteIt's looking very nice. The house doesn't look like the Fairfield at all anymore, and doesn't look like it started out as anything different than a Pickett Hill...did that make sense?
I need to do some work on my Fairfield today, your progress is motivating, and the speed with which you're moving is making me a tab bit guilty.
It is certainly motivating to see that others are interested in our blogs, and it is also very motivating to see what others are doing with their projects. I feel very enthused about my Fairfield even though it hasn't arrived yet and I won't be working on it for quite some time, by reading about your wonderful project. Thank you for sharing - it certainly is hard to tell that it started as a Fairfield, it is looking more like a PH every post.
ReplyDelete